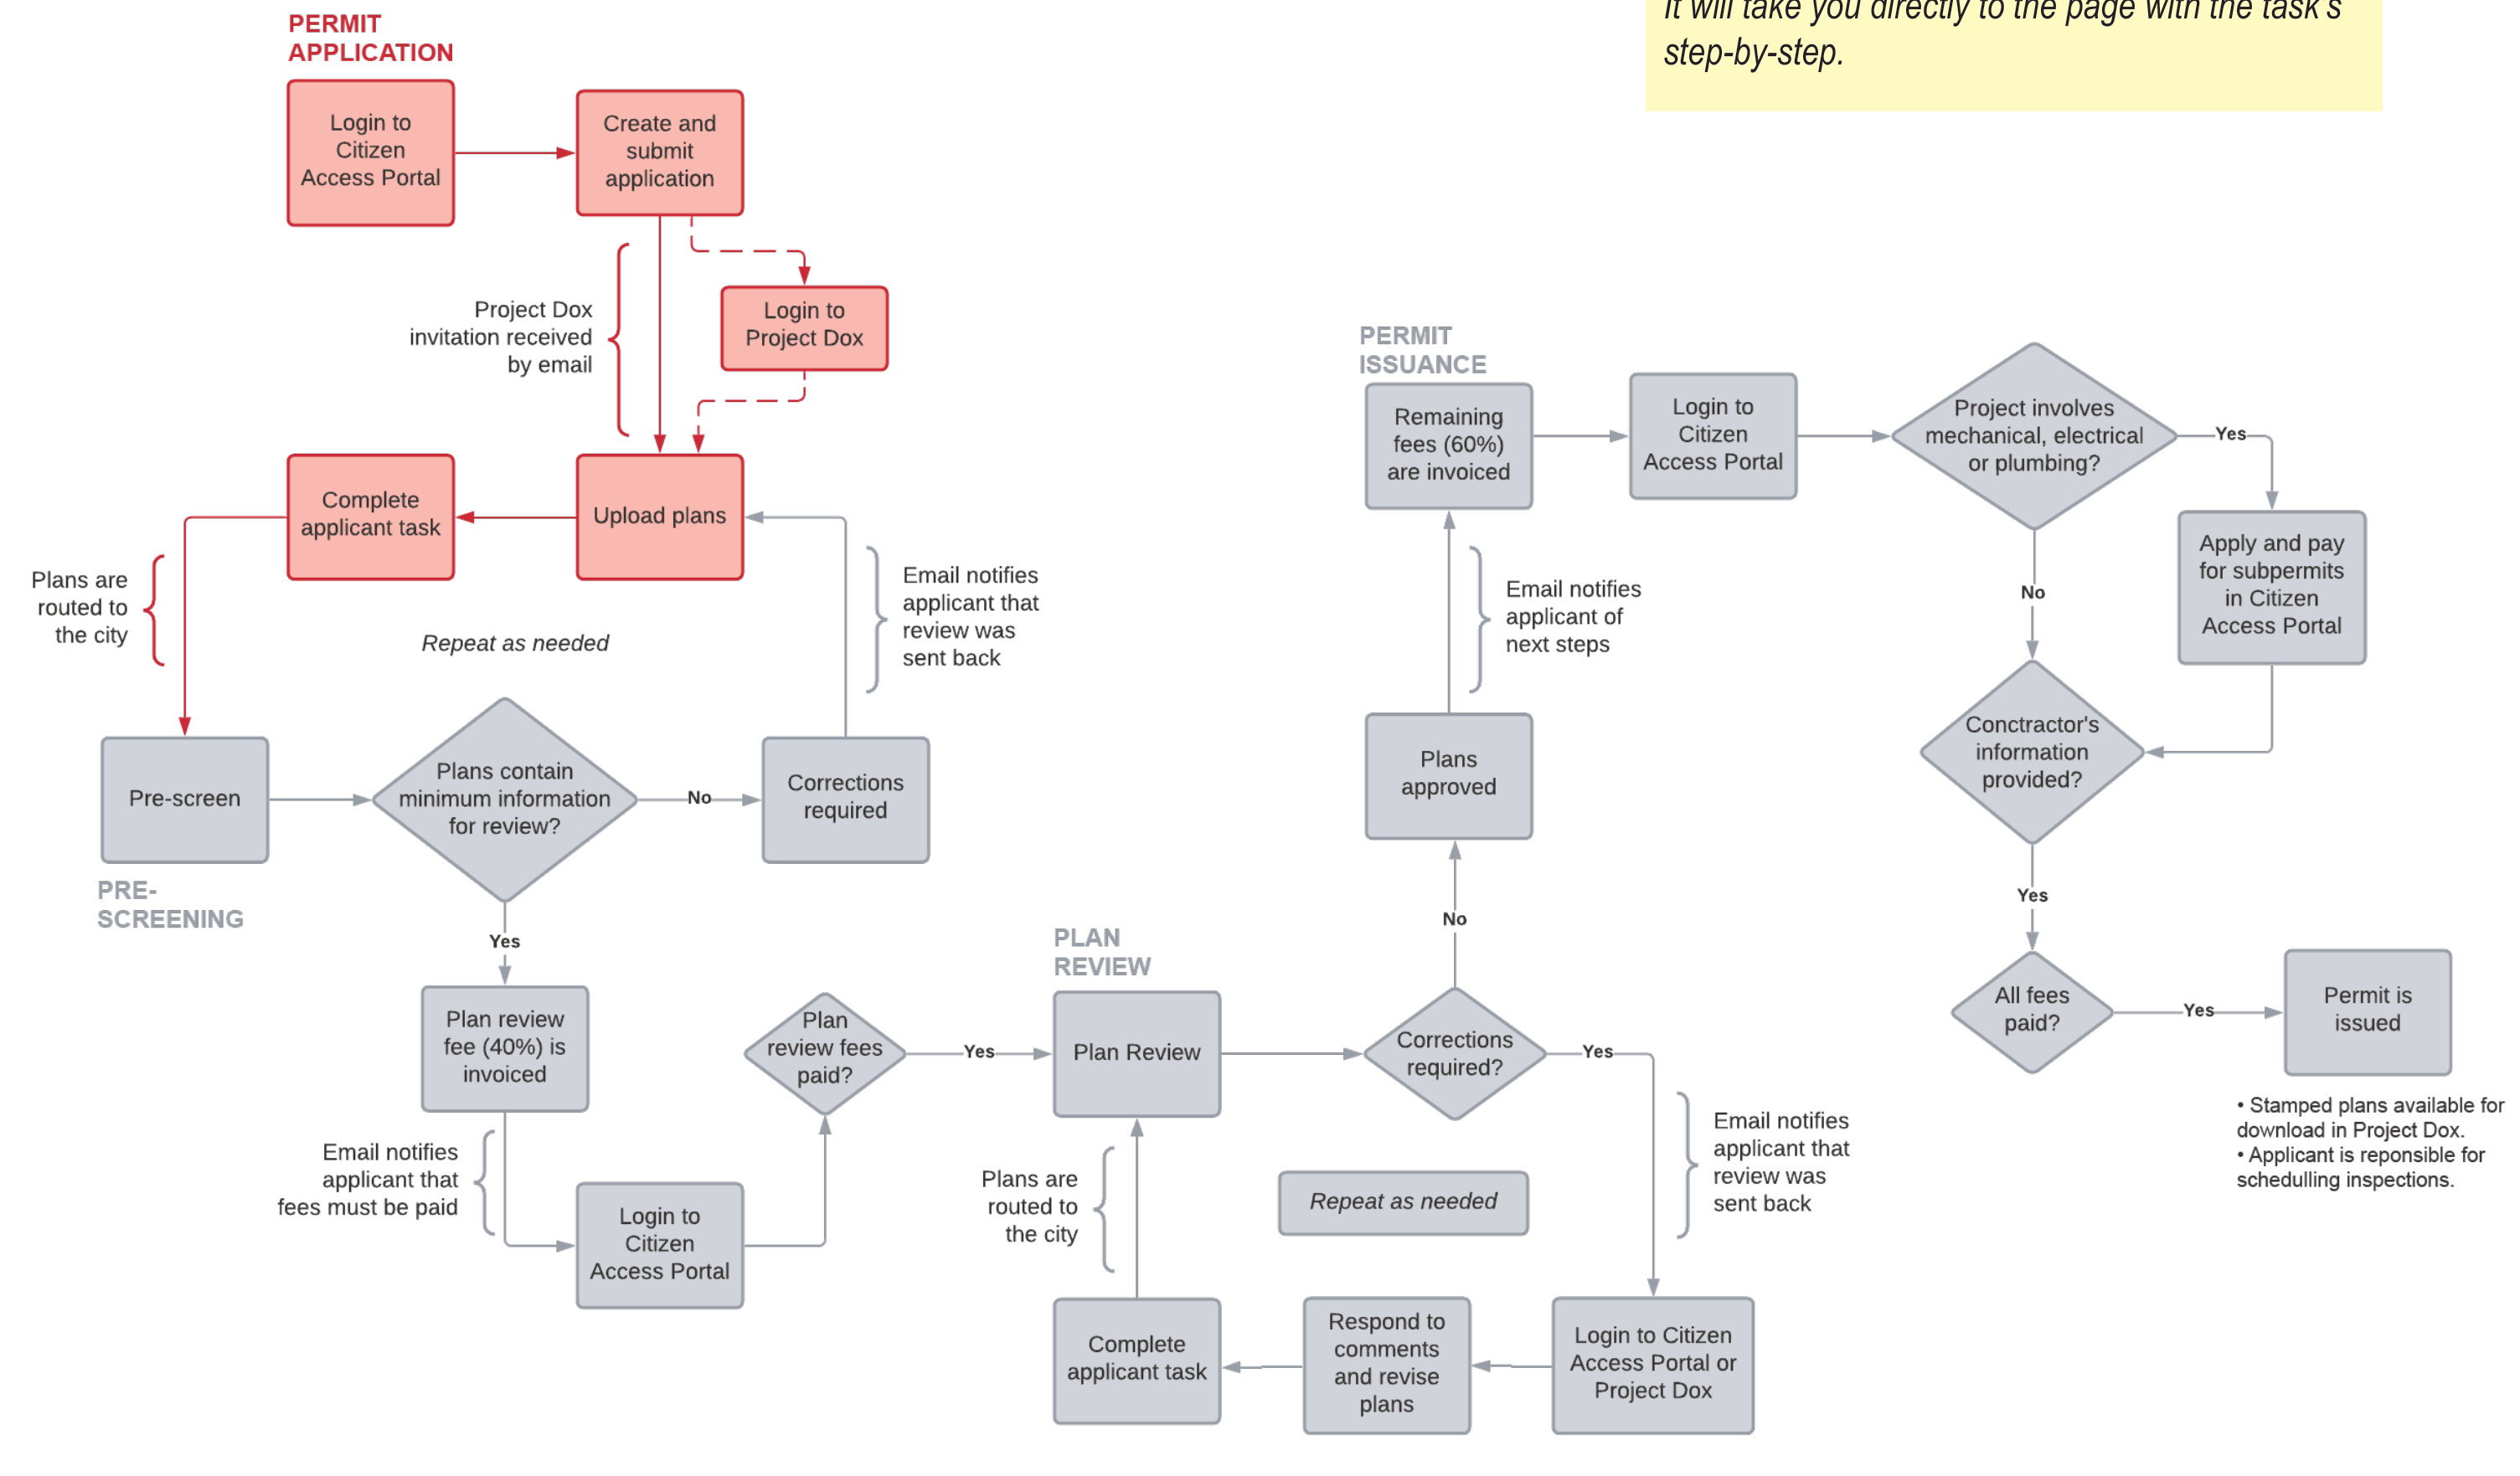
Permit application
- Log in to the Citizen Access Portal and create and submit the application.
- Receive a ProjectDox invitation by email or log in directly to ProjectDox.
- Upload plans and complete the applicant task.
- Plans are routed to the city.

Salt Lake City Building Services
Use the Citizen Access Portal to create and submit a permit application, then upload plans in ProjectDox and complete the applicant task so the plans can be routed to the city.
Before you begin
The city checks whether the plans contain the minimum information for review.
The city conducts plan review.
Step 1
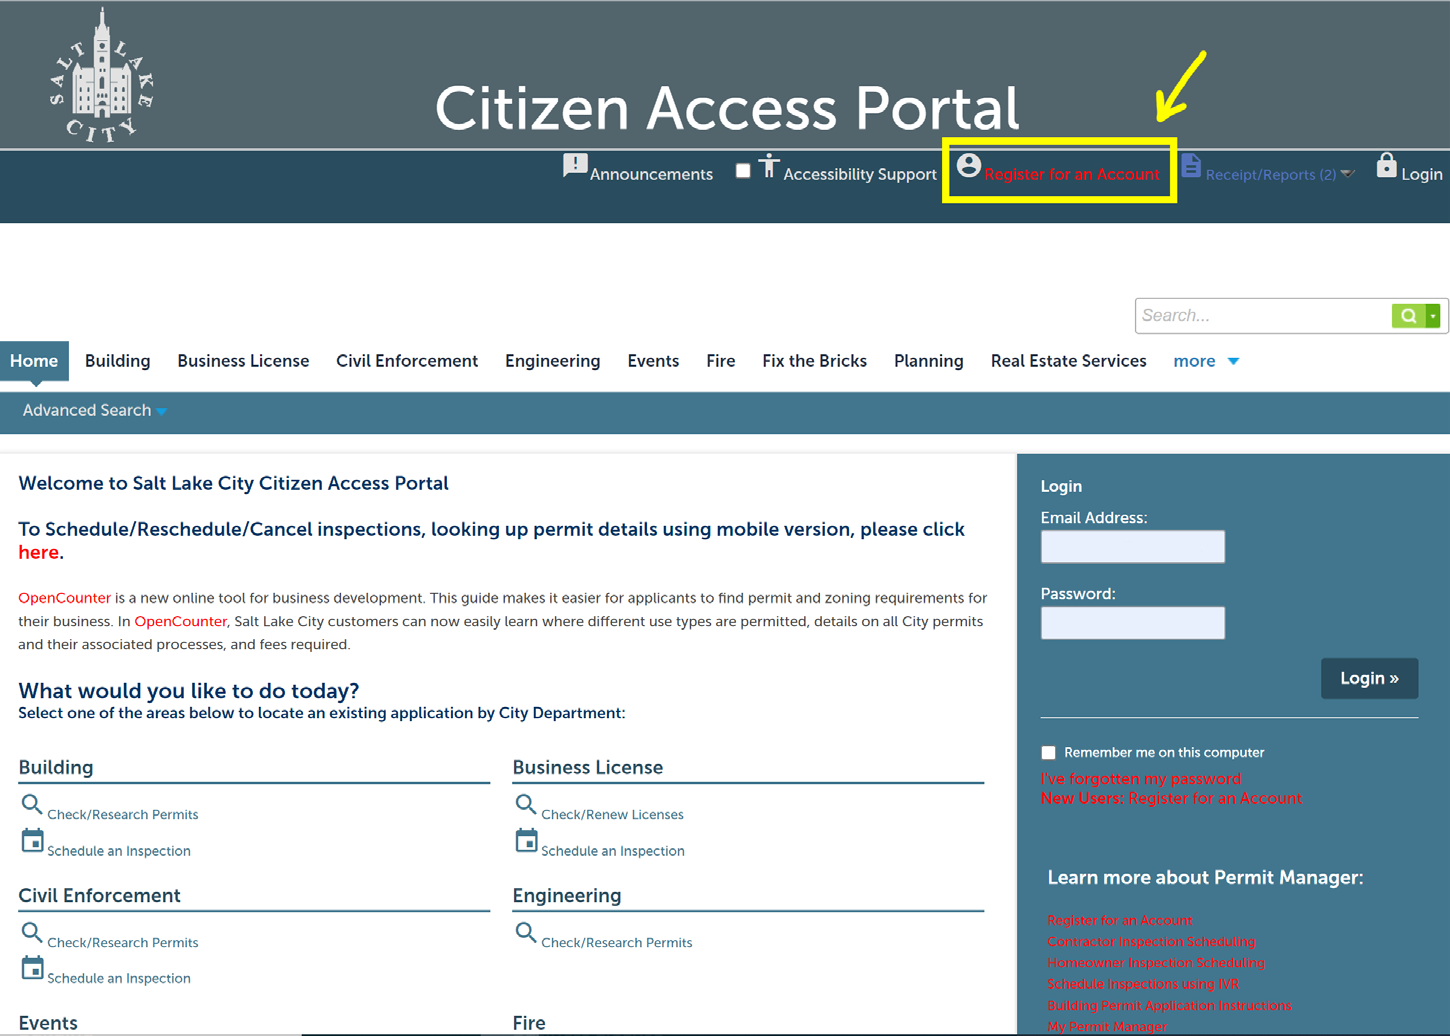
Go to www.slcpermits.com and follow the steps to create an account. If you already have an account, skip this step.
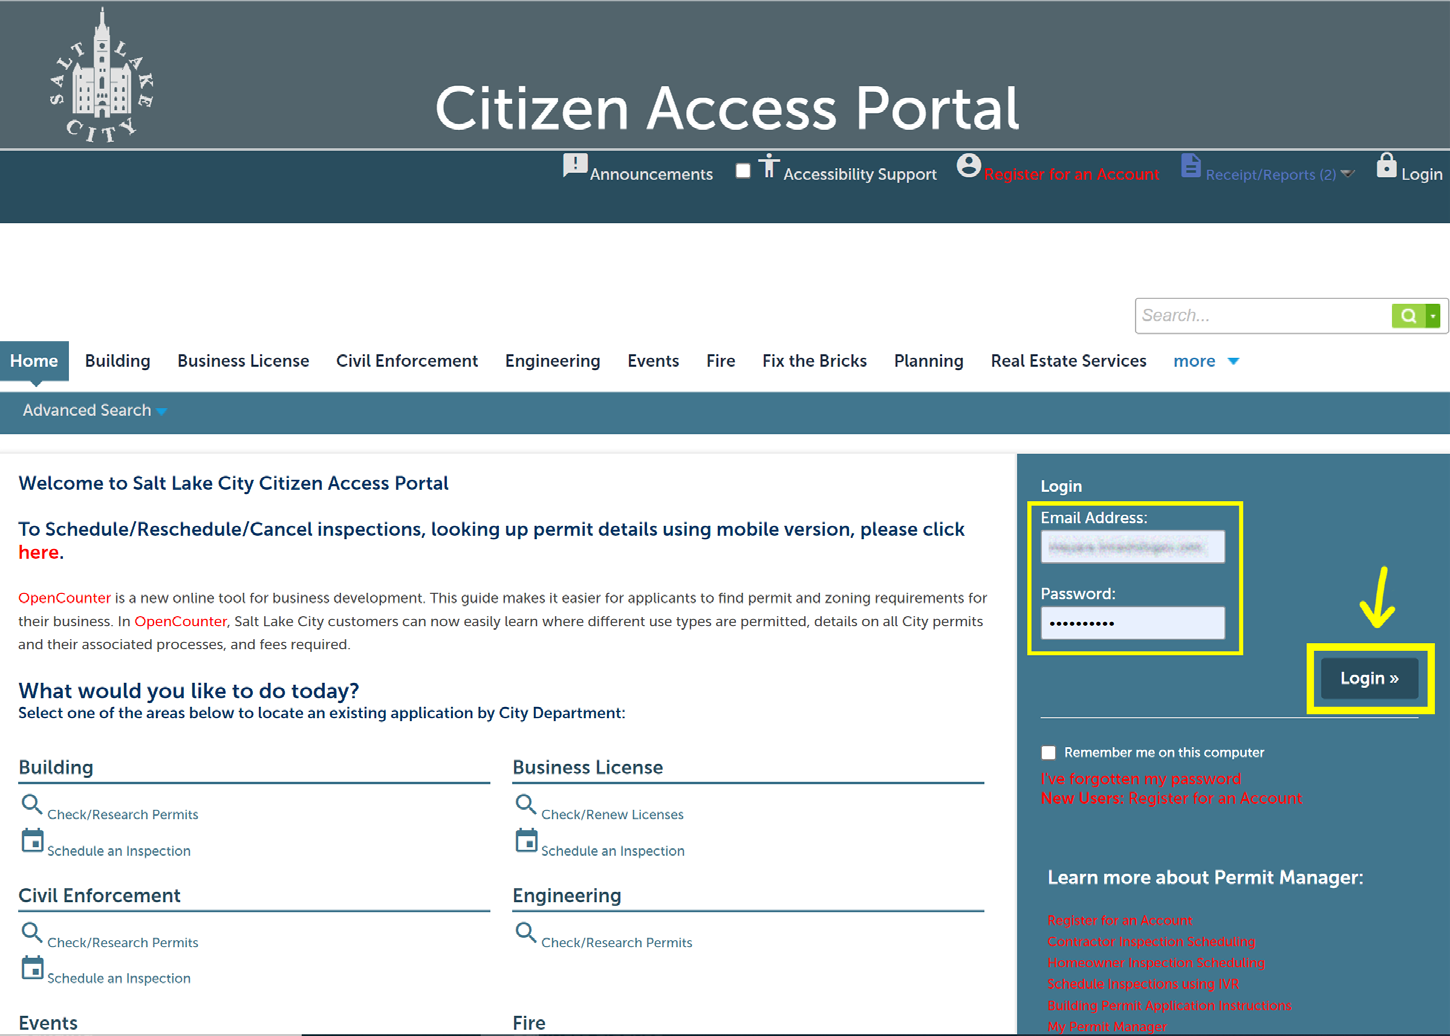
Enter your account information and select “Login.”
Step 2
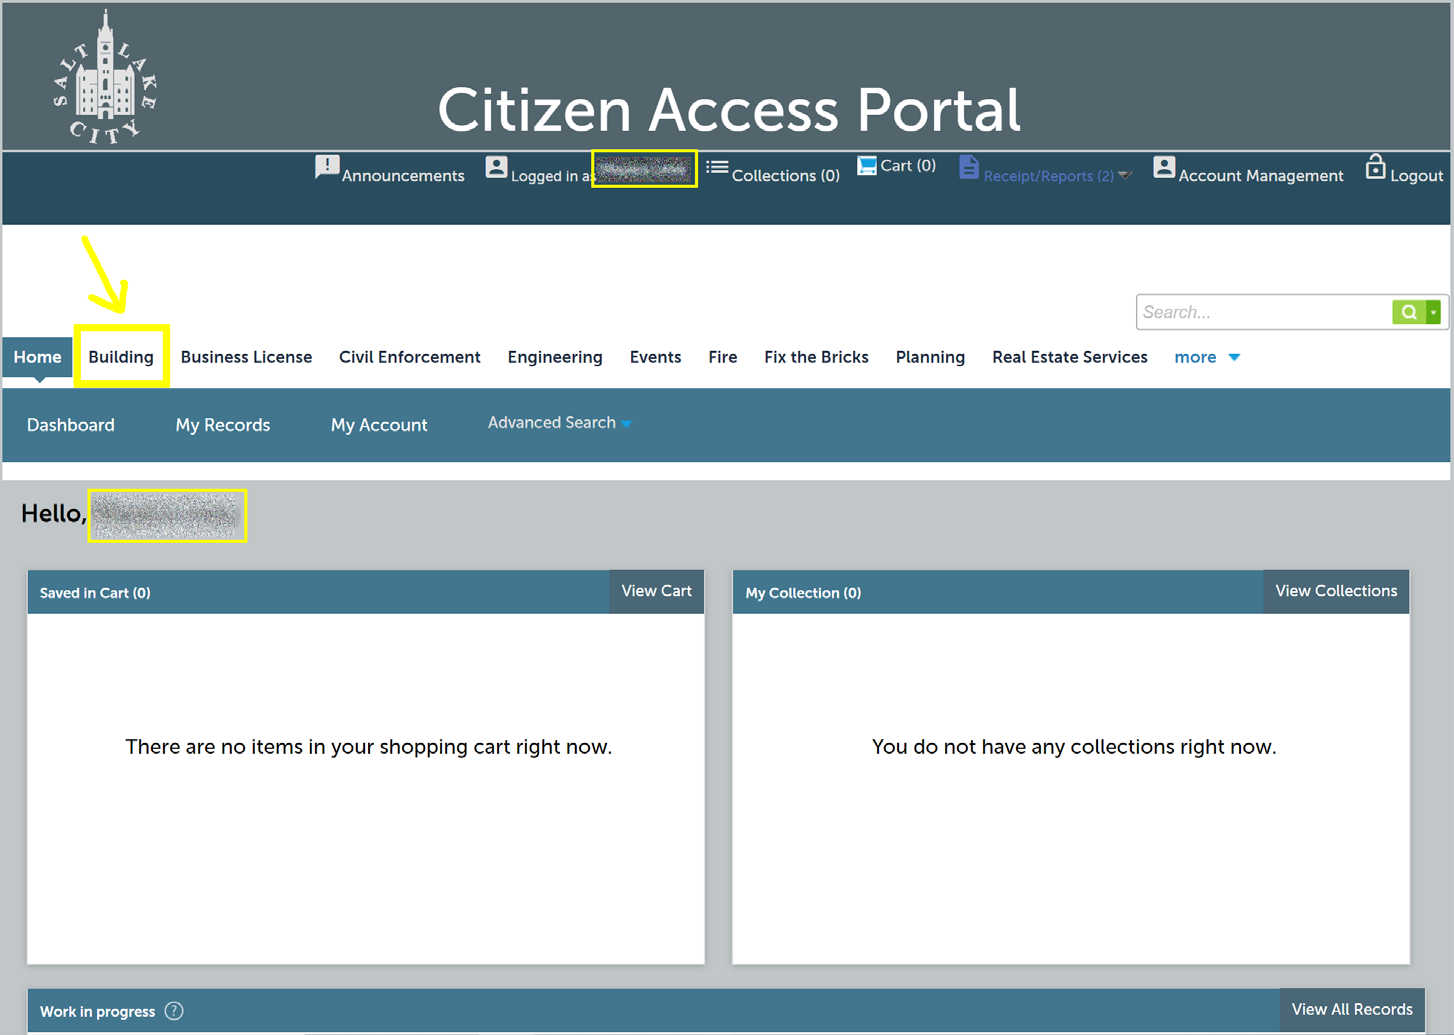
Make sure your name is showing on the refreshed page. You must be logged in to access your account information and apply for a permit.
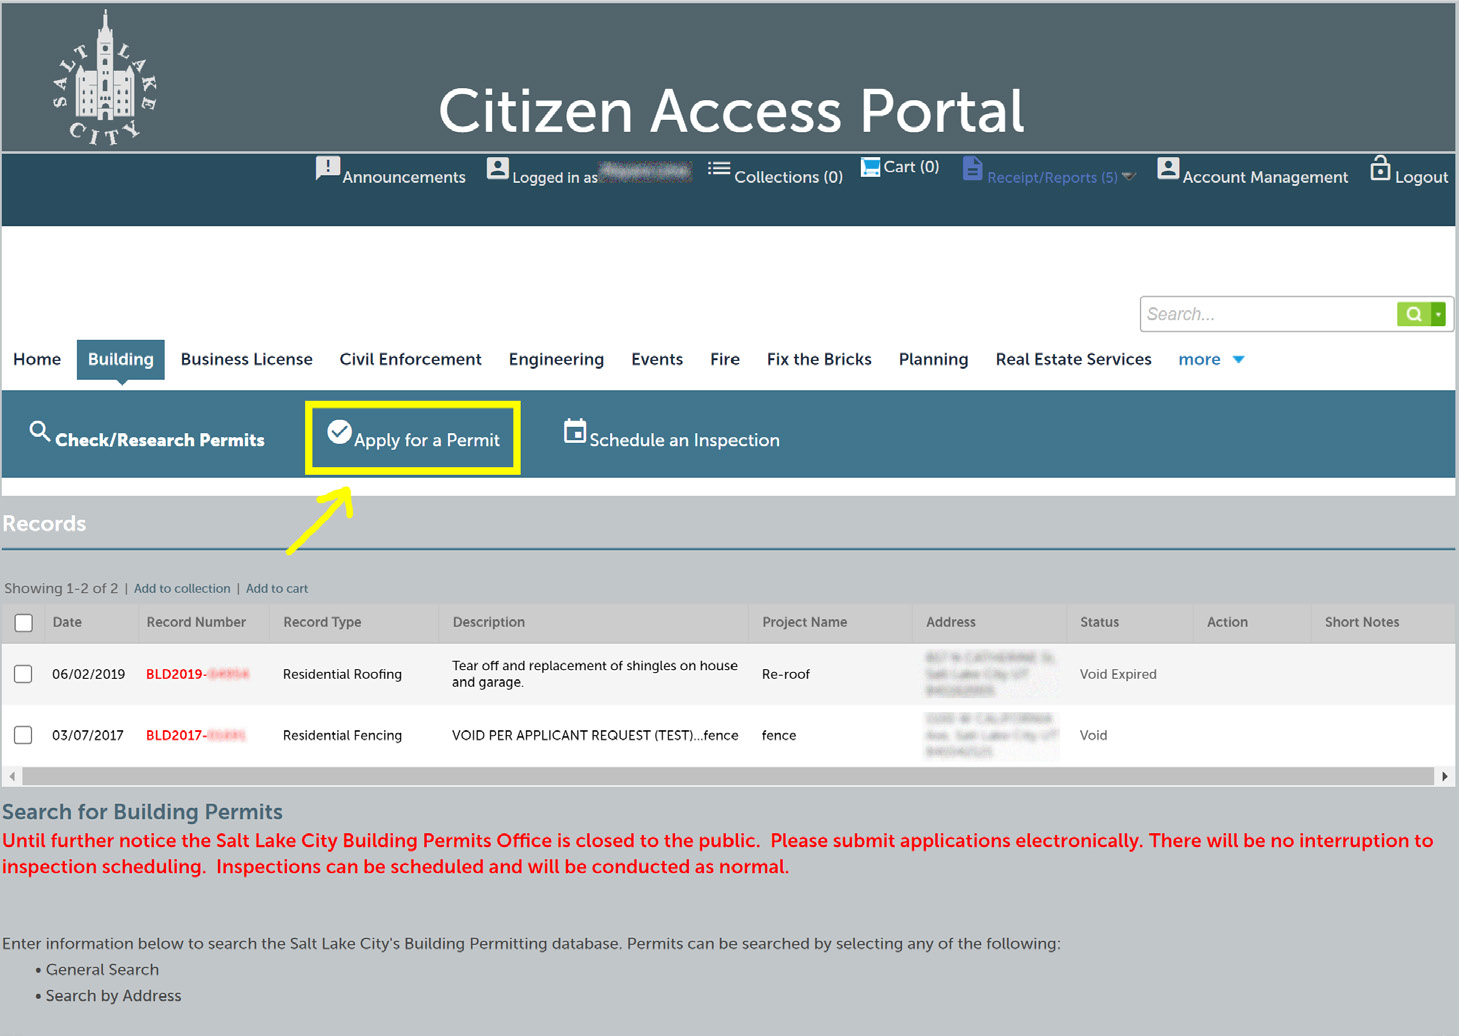
The page also shows all previous permit records associated with the account.
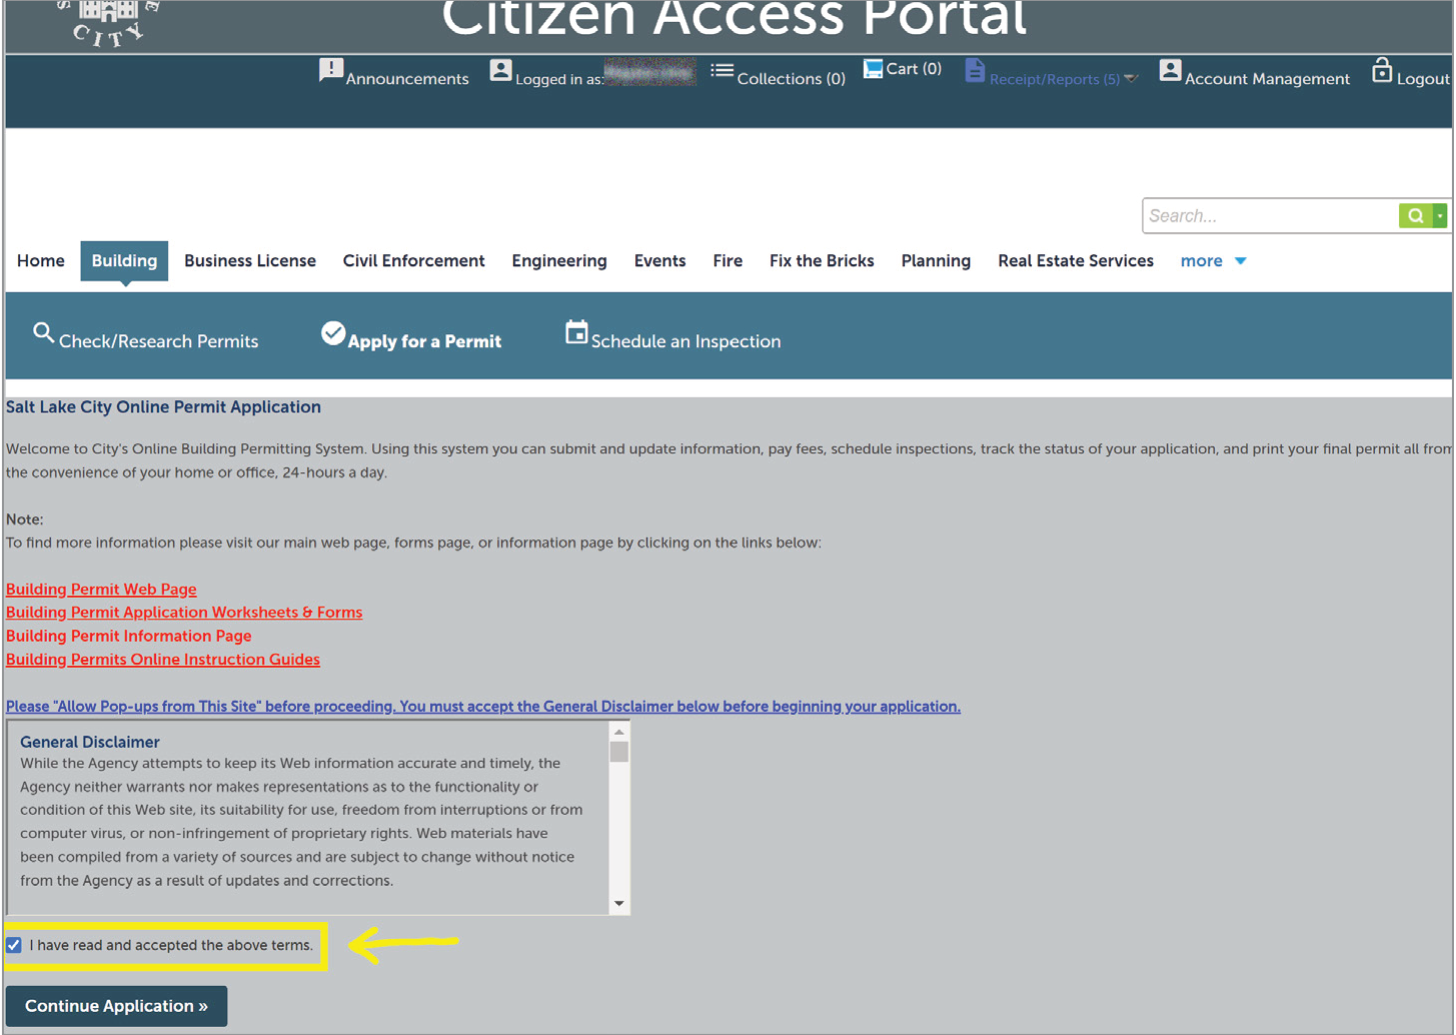
Read the terms, check the box, and select “Continue Application.”
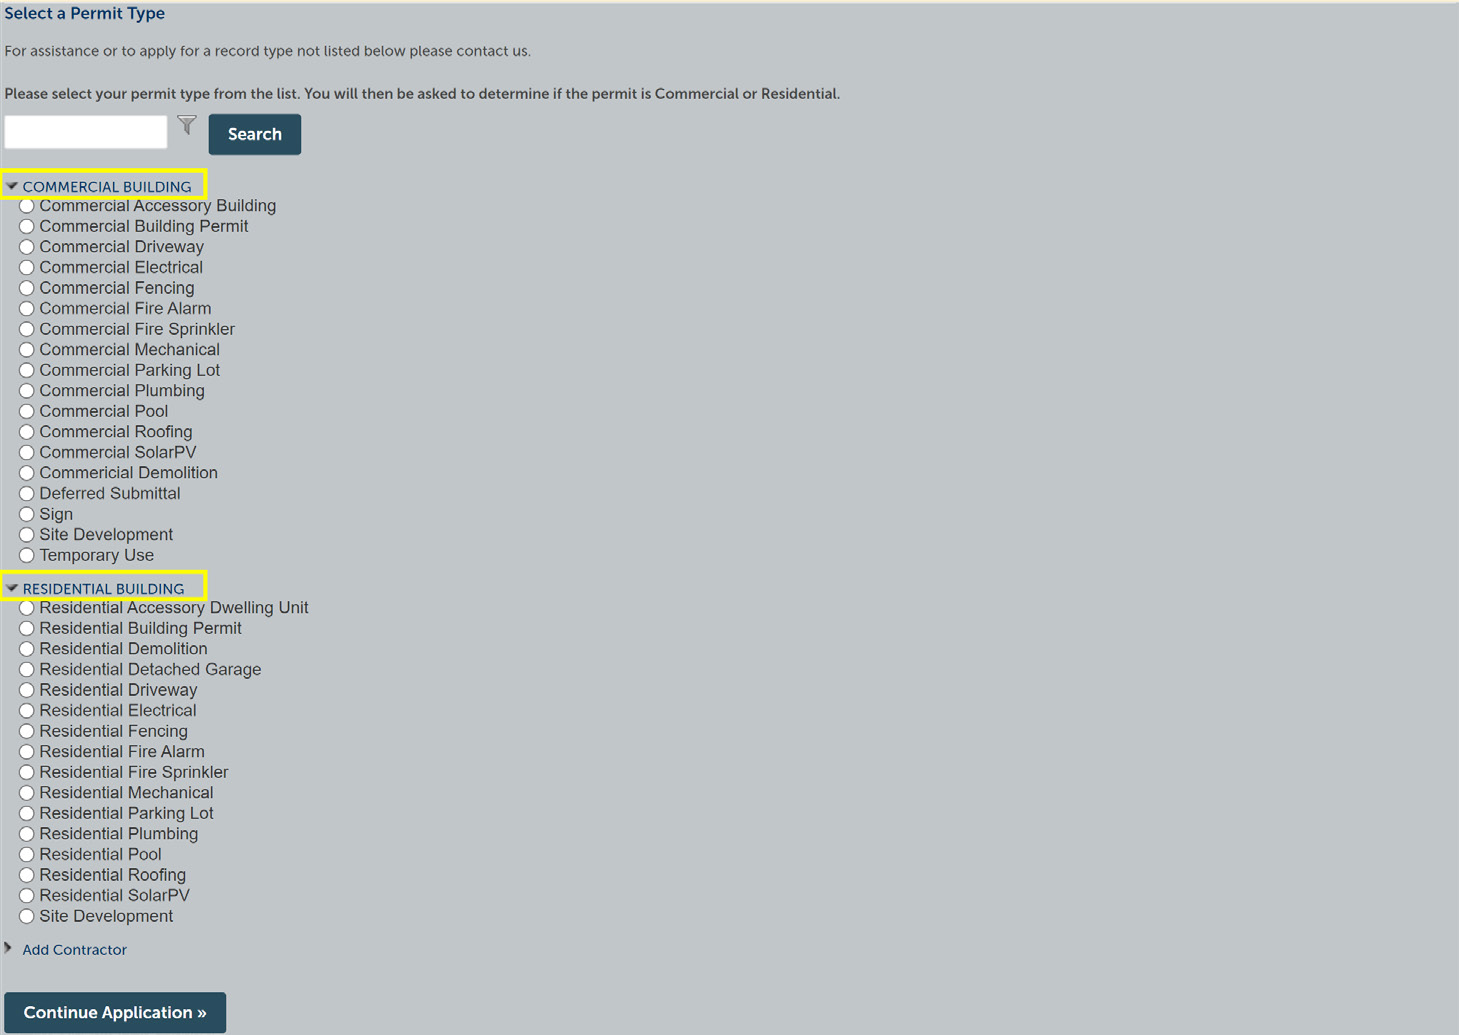
Select the permit type and choose “Continue Application.” Choosing the incorrect permit type will result in a voided permit.
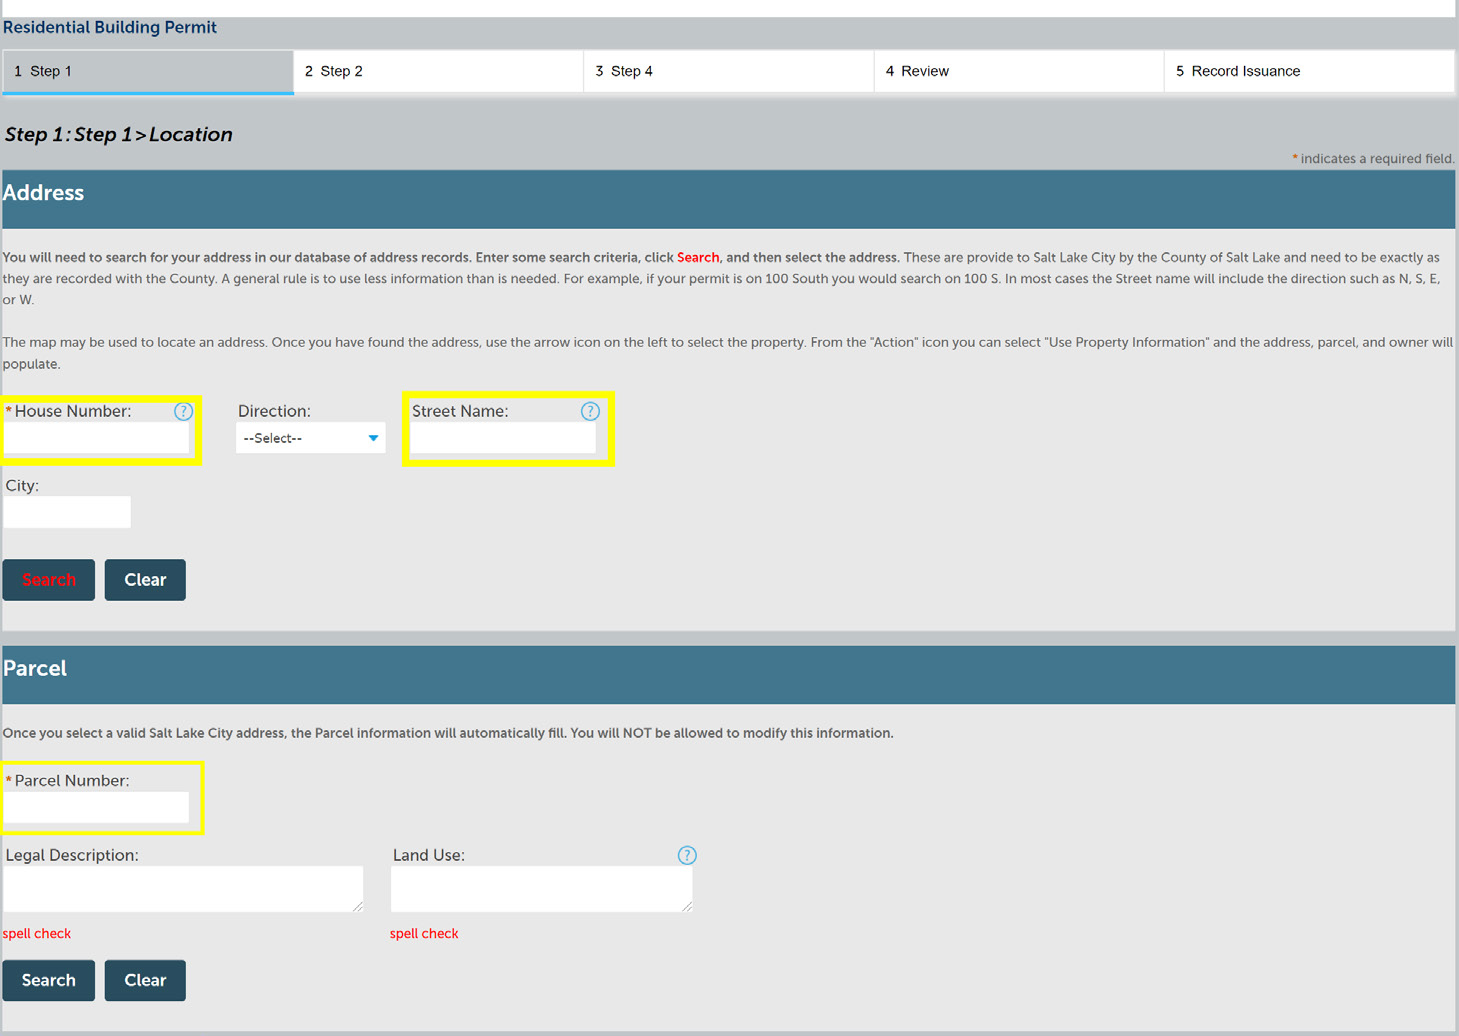
Enter the address or the parcel number and select “Search.” The other information populates automatically. Select “Continue Application.”
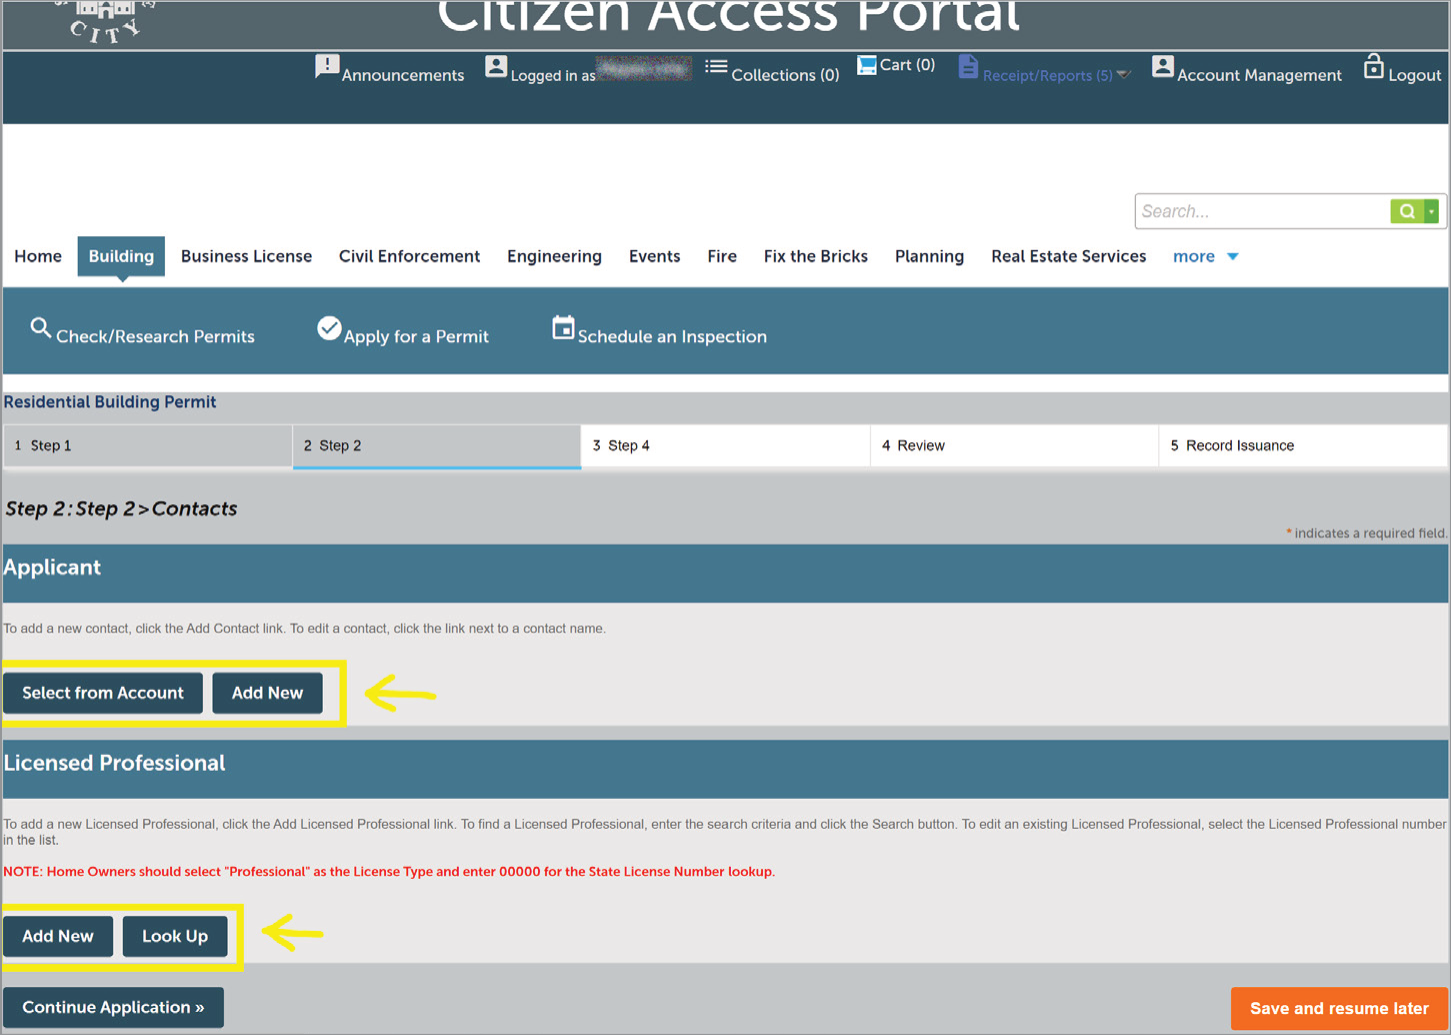
The “Applicant” is the primary permit contact—the person who should be contacted about this application. After adding both contacts, select “Continue Application.”
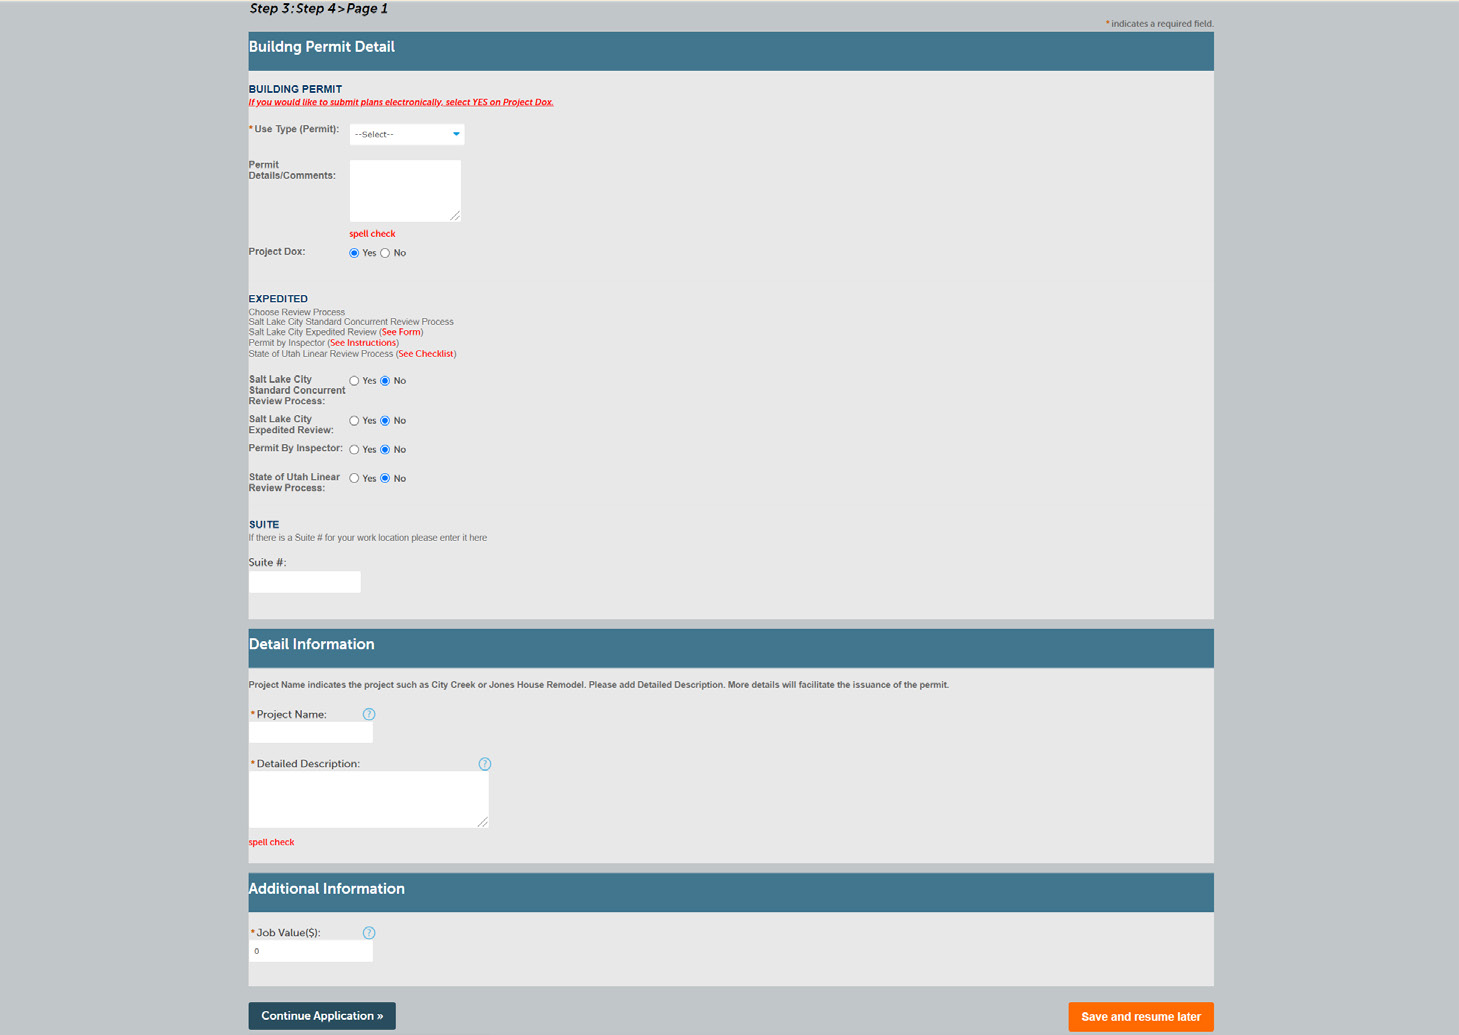
Follow the instructions to select the review type and add information about the permit application. Complete all required fields marked with an asterisk (*) and select “Continue Application.”
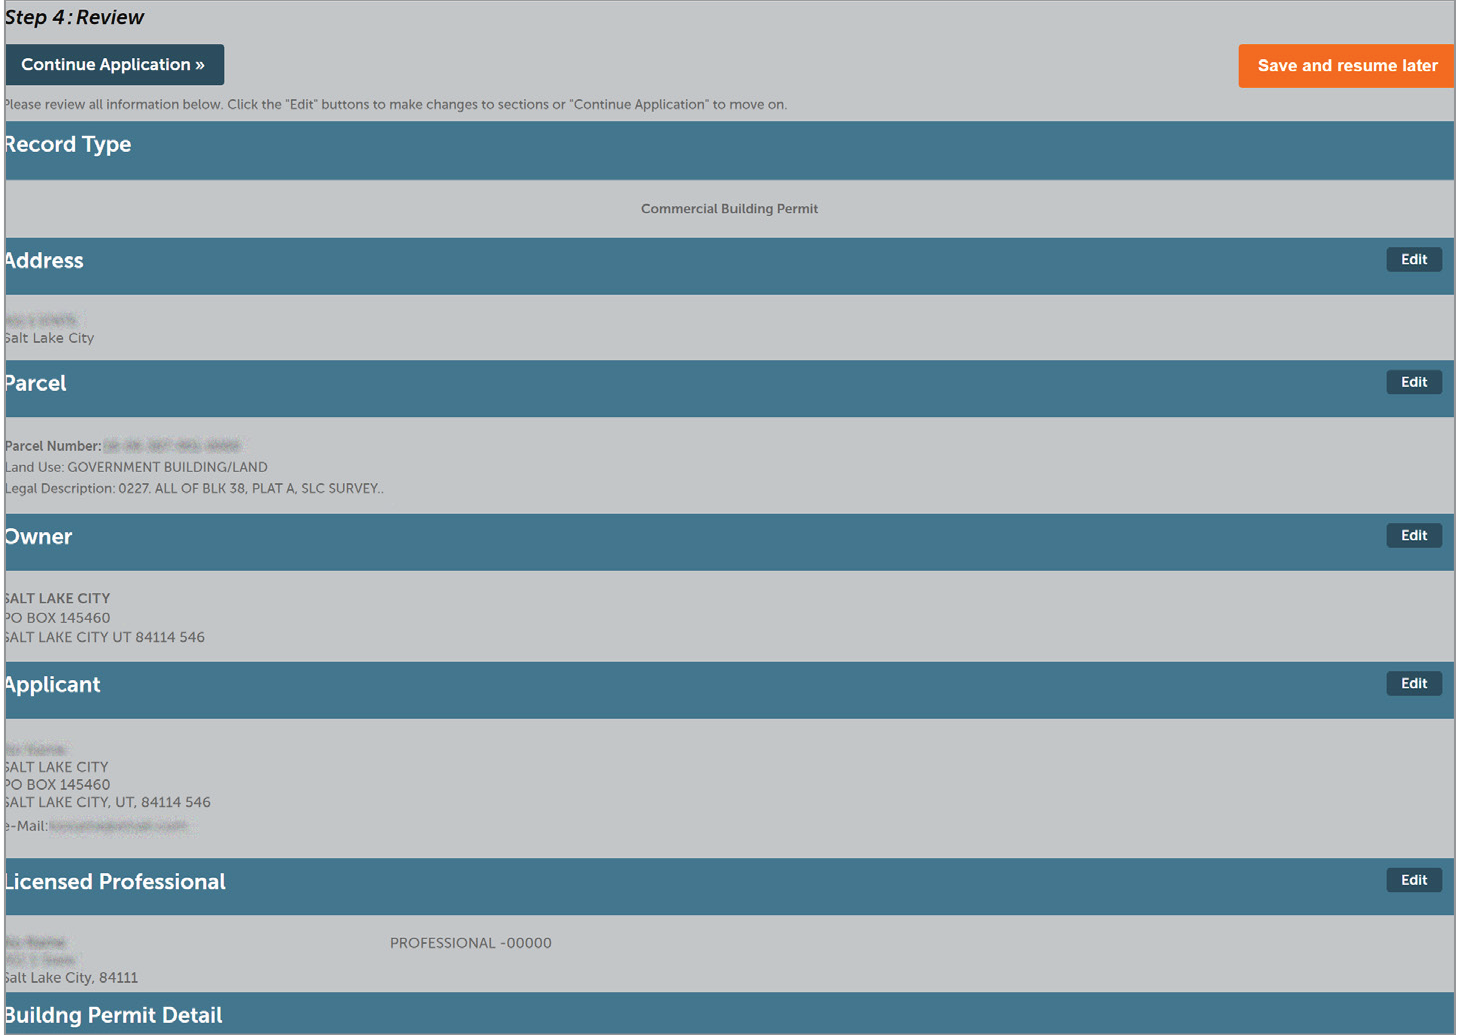
Make sure all information is correct. Select “Edit” on any section that needs a change, then select “Continue Application.”
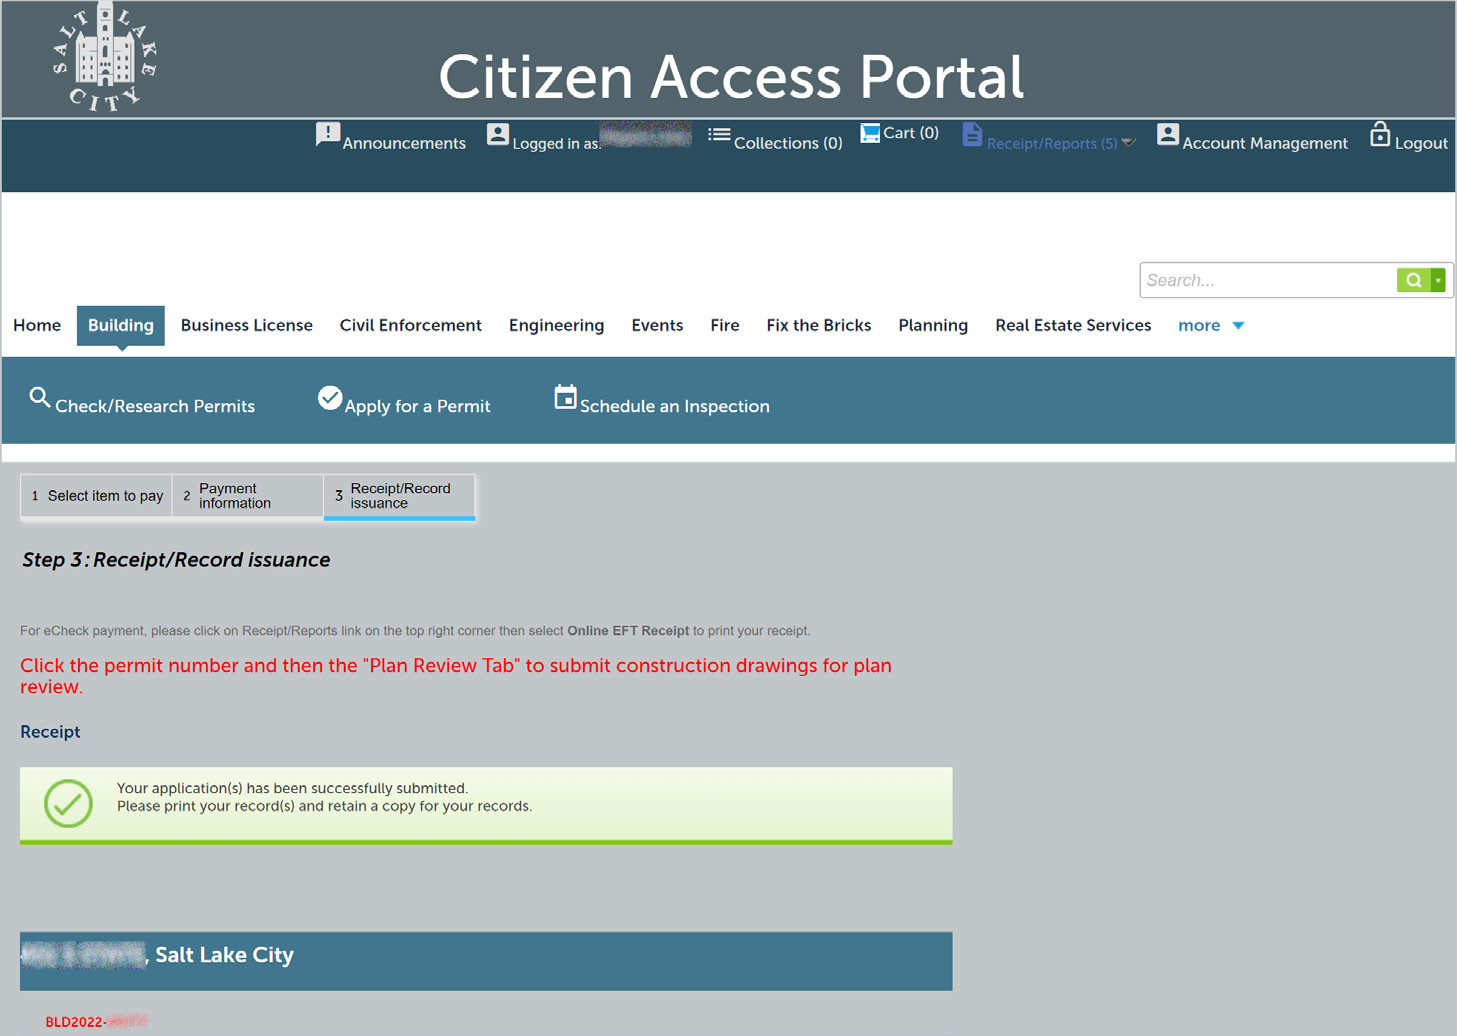
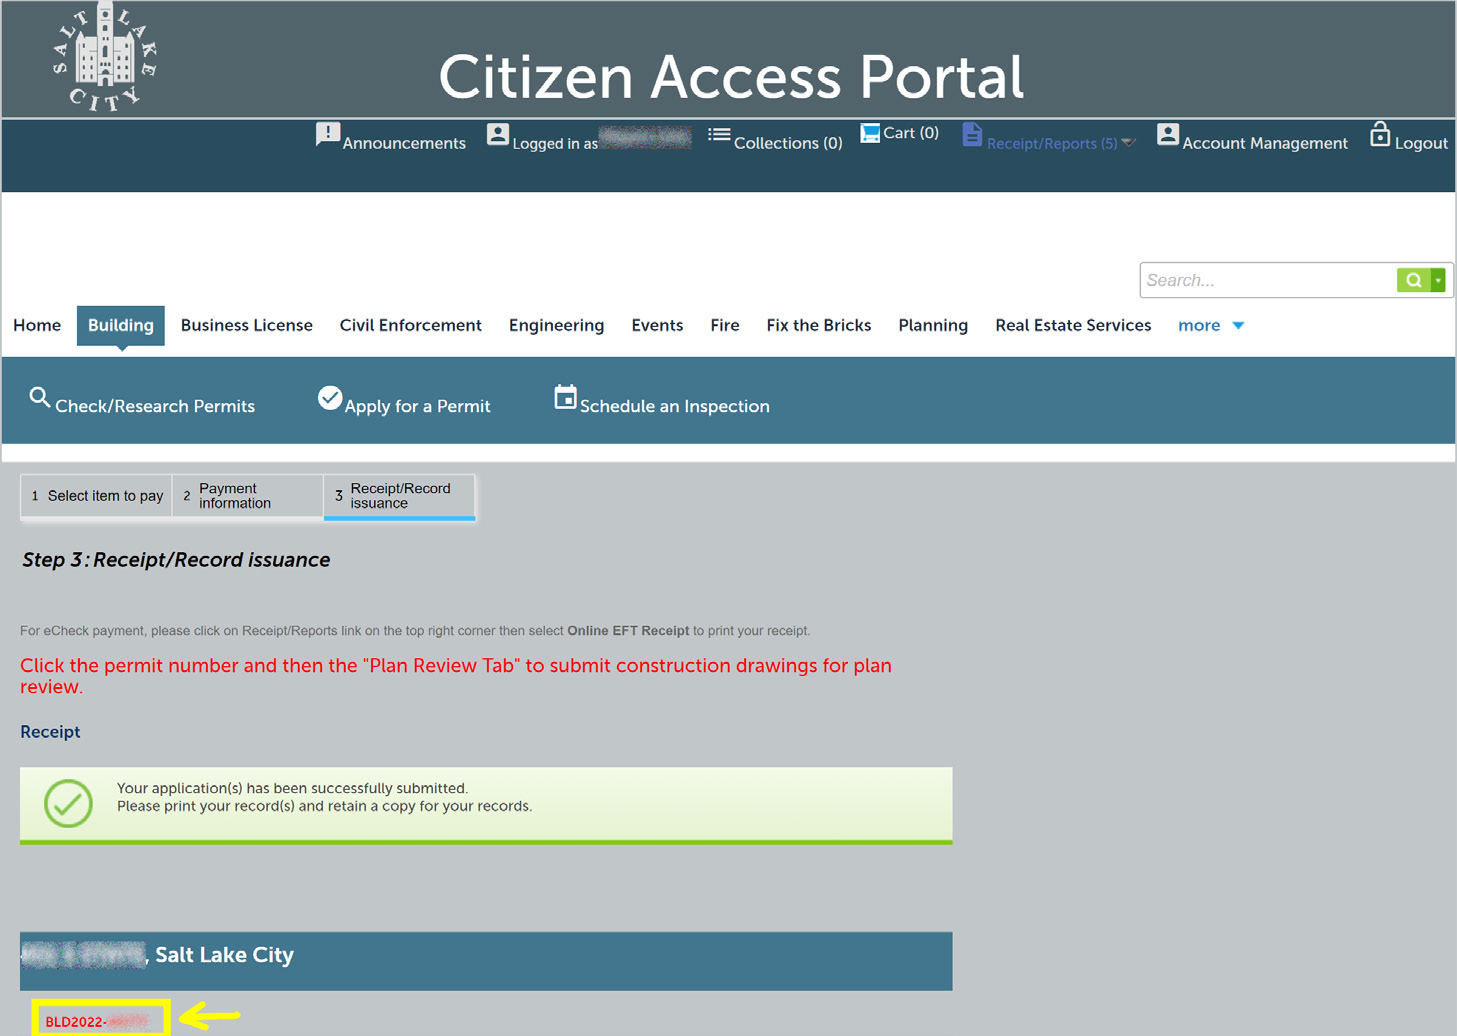
The green box confirms the application was submitted. The payment workflow shows: 1. Select item to pay; 2. Payment information; 3. Receipt/Record issuance.
For an eCheck payment, select the “Receipt/Reports” link in the top-right corner, then select “Online EFT Receipt” to print the receipt.
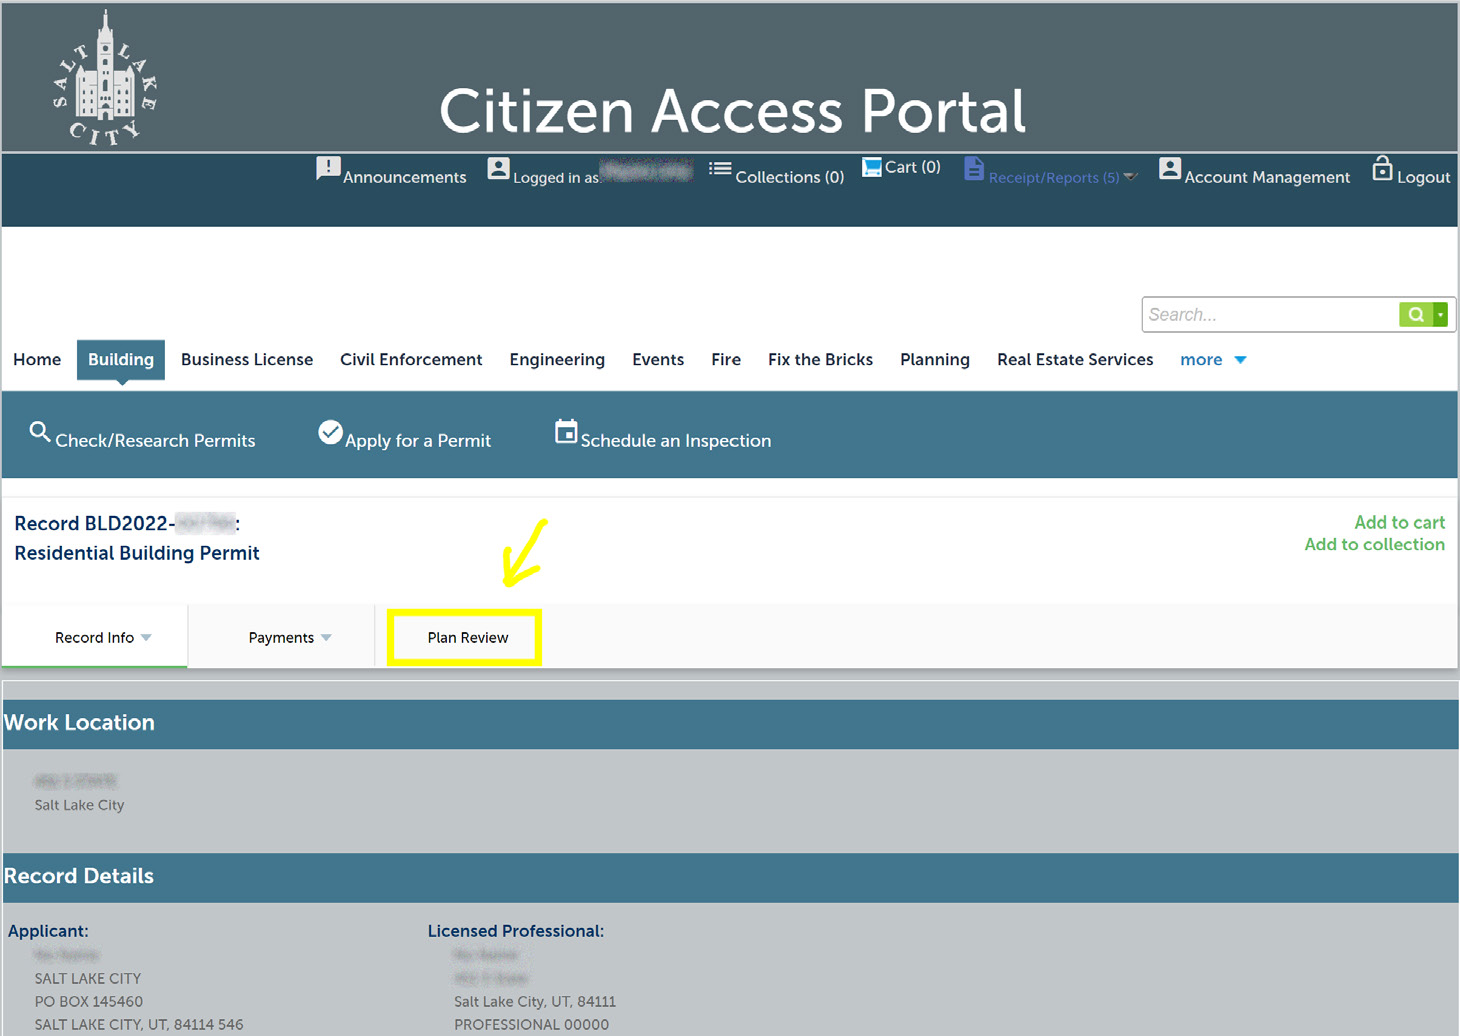
Select the permit number and then the “Plan Review” tab to submit construction drawings for plan review.
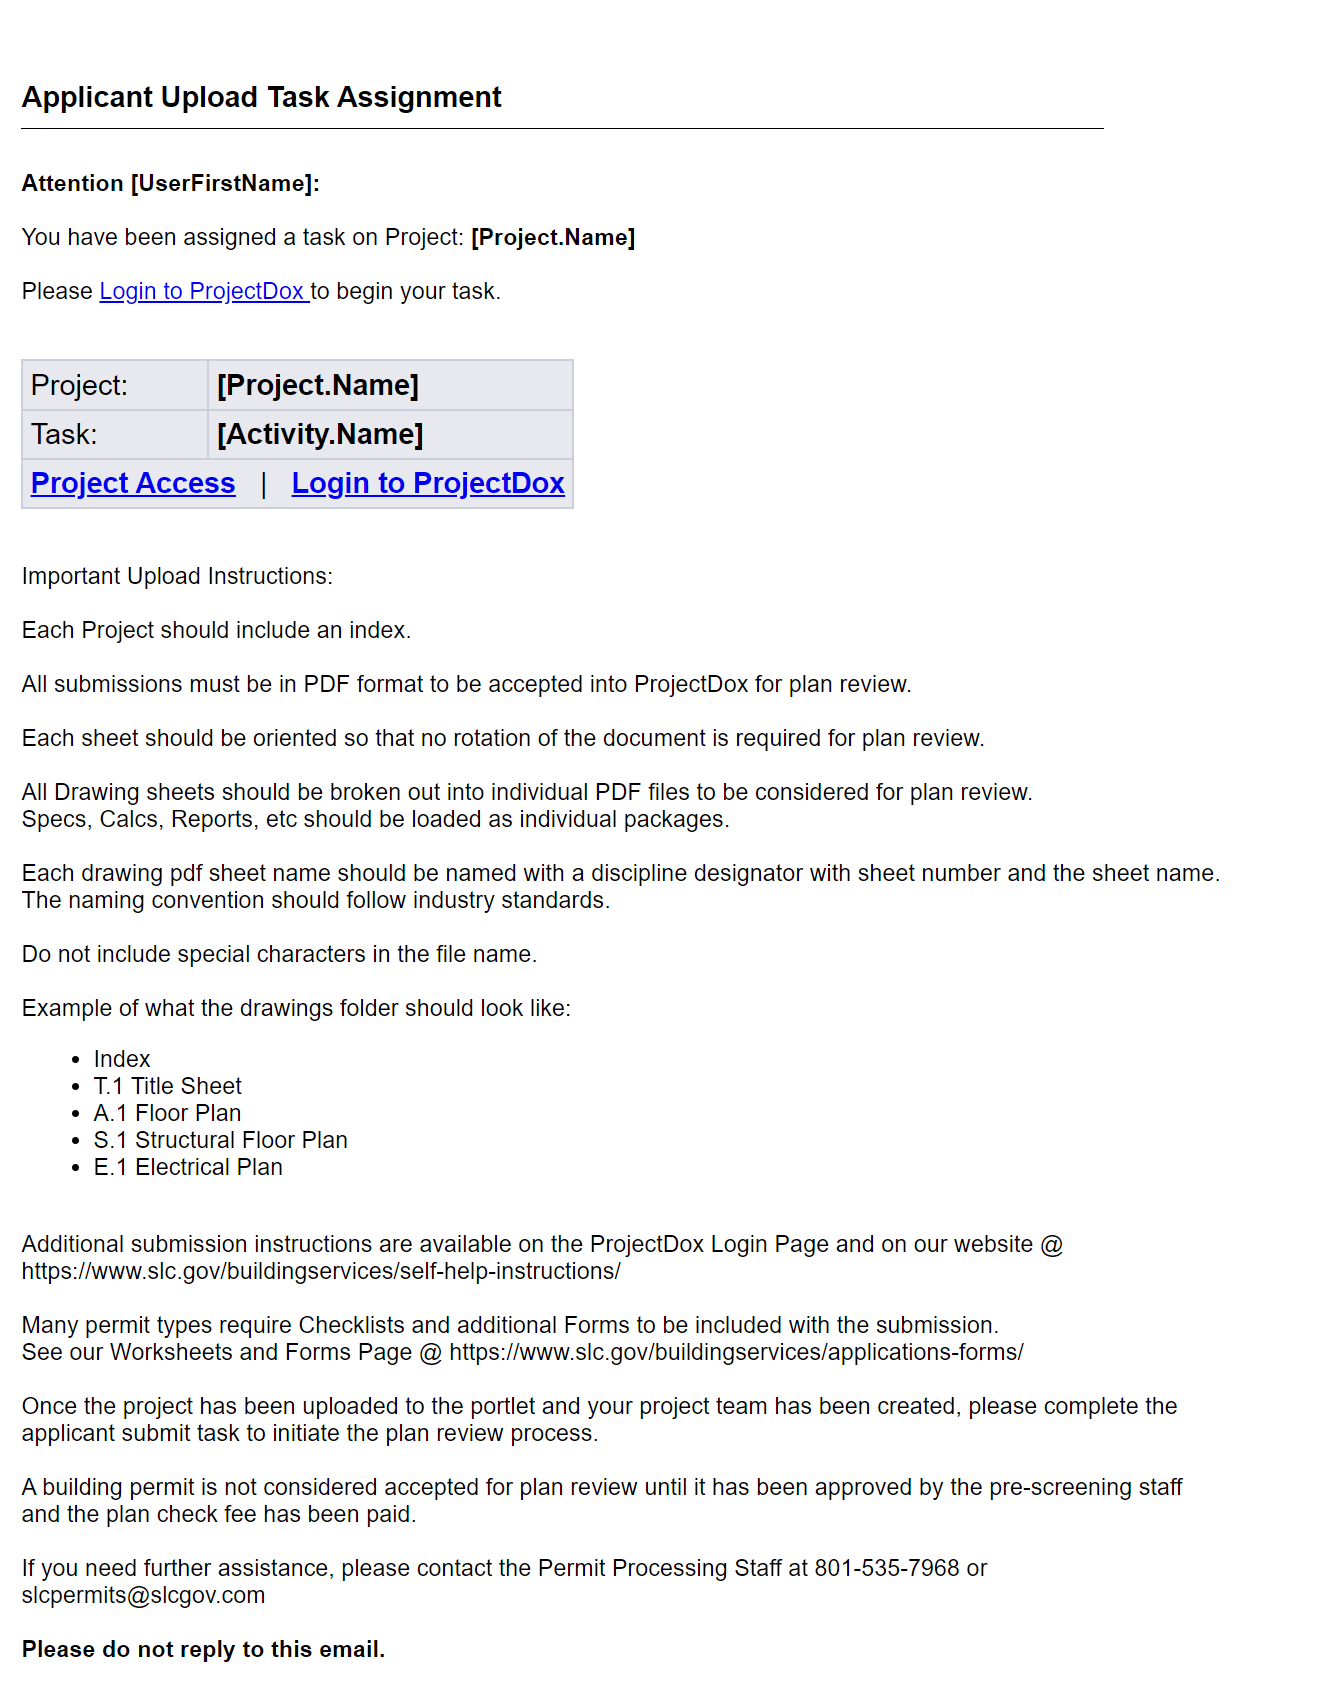
The invitation is sent within minutes to the email entered for the “Applicant” in the permit application. If it is not in the inbox, check the junk folder first, then call for assistance.
Native text version of the email
Attention [UserFirstName]:
You have been assigned a task on Project: [Project.Name]. Please log in to ProjectDox to begin your task.
Example drawings folder:
Find additional submission instructions on the Building Services self-help instructions page.
Many permit types require checklists and additional forms. See the Building Services applications and forms page.
After the project is uploaded and the project team is created, complete the applicant submit task to start the plan review process.
A building permit is not accepted for plan review until prescreening staff approve it and the plan check fee is paid.
For further assistance, contact Permit Processing Staff at 801-535-7968 or slcpermits@slc.gov. Do not reply to the notification email.
Step 3
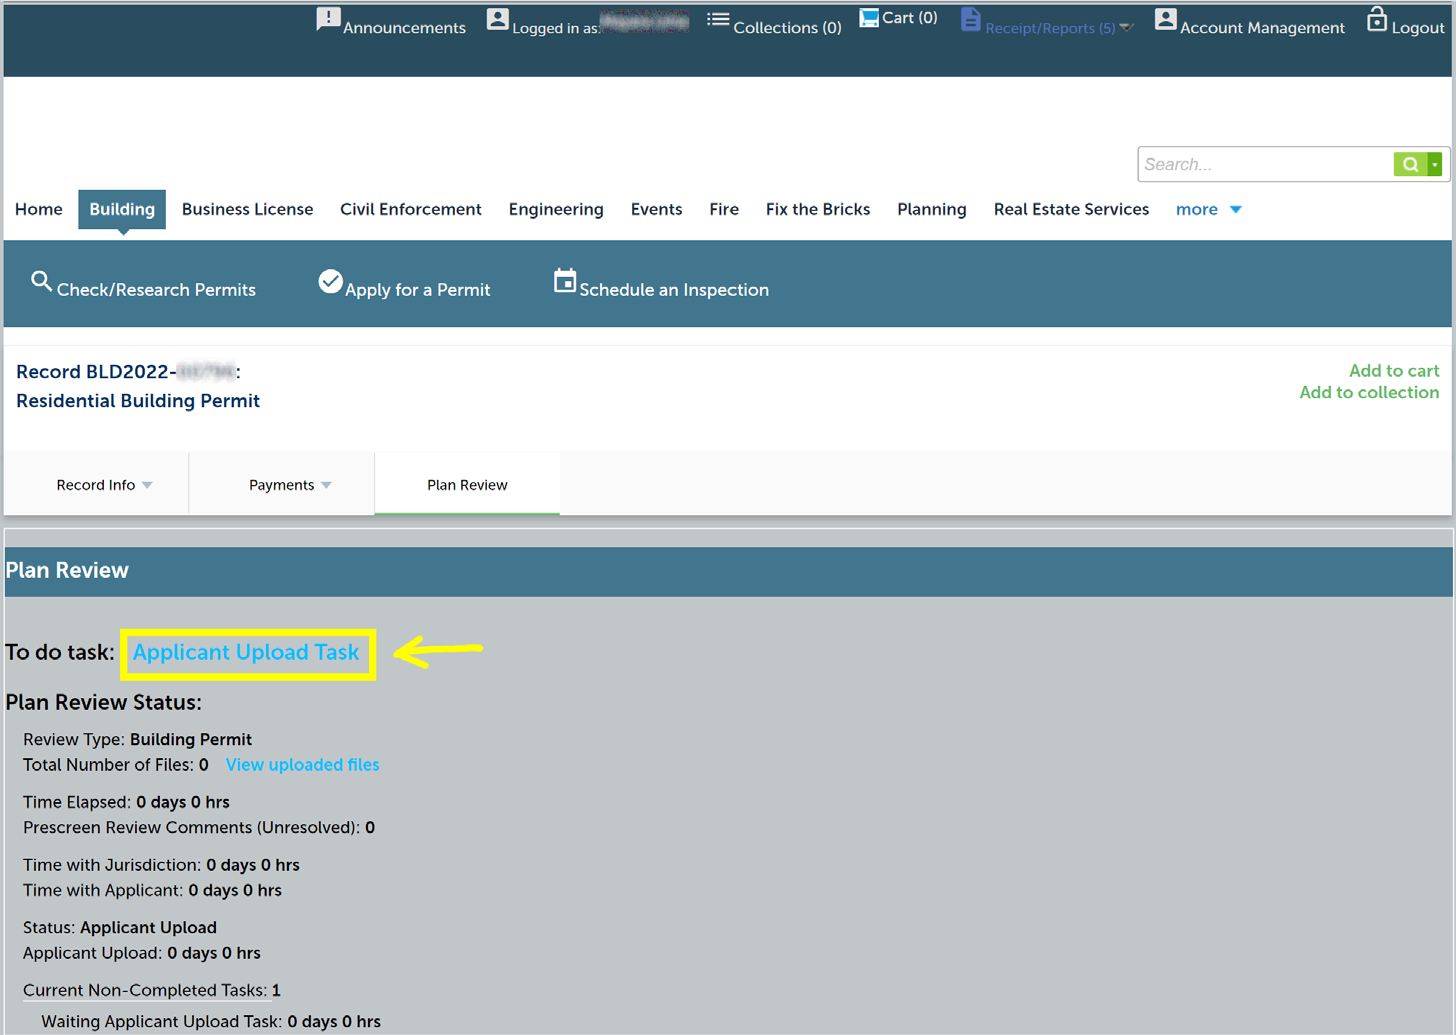
The page shows pending tasks and other review information. Selecting the task opens a new page that directs you to ProjectDox. Continue with the shared upload steps below.
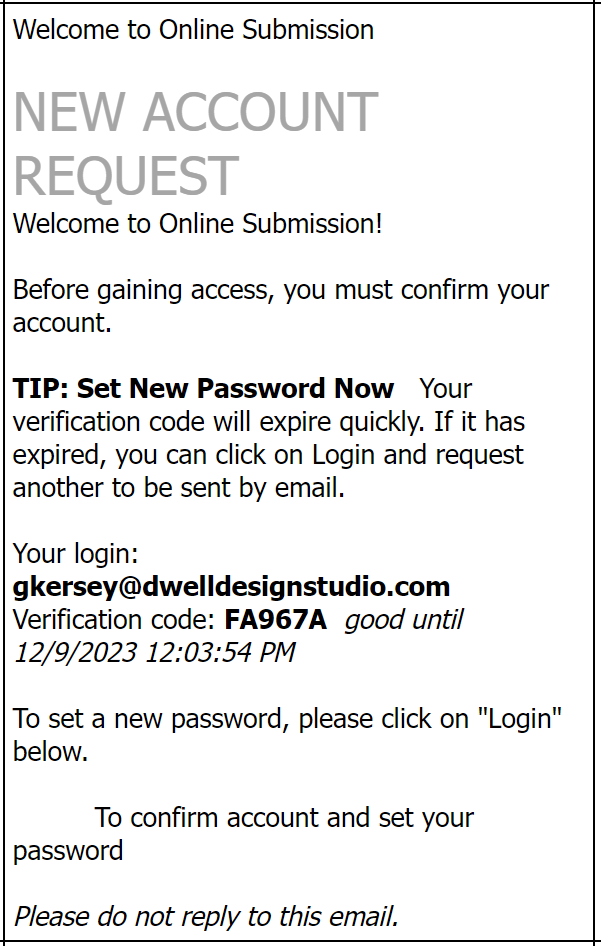
If you are using ProjectDox for the first time, the invitation email includes a user login and temporary password. Select “Permit Access Link” to enter the account.
Welcome to Online Submission — New Account Request
Before gaining access, you must confirm your account.
Tip: Set New Password Now. Your verification code expires quickly. If it has expired, select “Login” and request another code by email.
The example email shows the user login and a time-limited verification code, then directs the user to select “Login” to confirm the account and set a password. Do not reply to this email.
Attention [UserFirstName]: You have been assigned a task on Project: [Project.Name].
Please Login to ProjectDox to begin your task.
Project Access | Login to ProjectDox
The email repeats the important upload instructions provided earlier in this guide.
An Upload Task Assignment email is sent with the ProjectDox invitation. Select “Login to ProjectDox.”
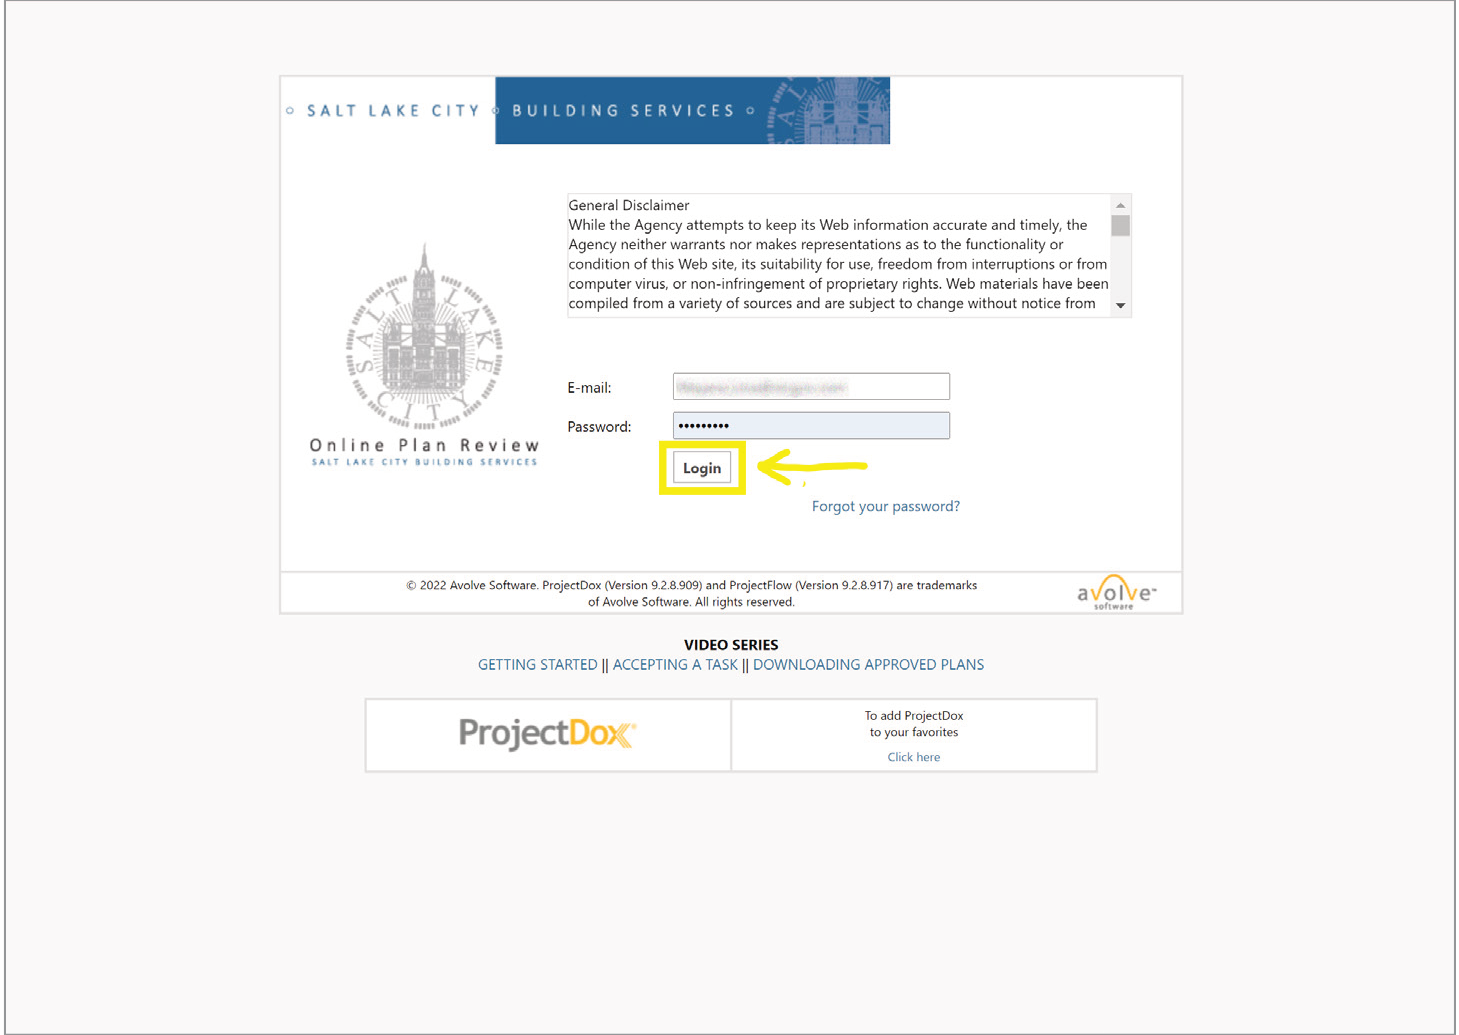
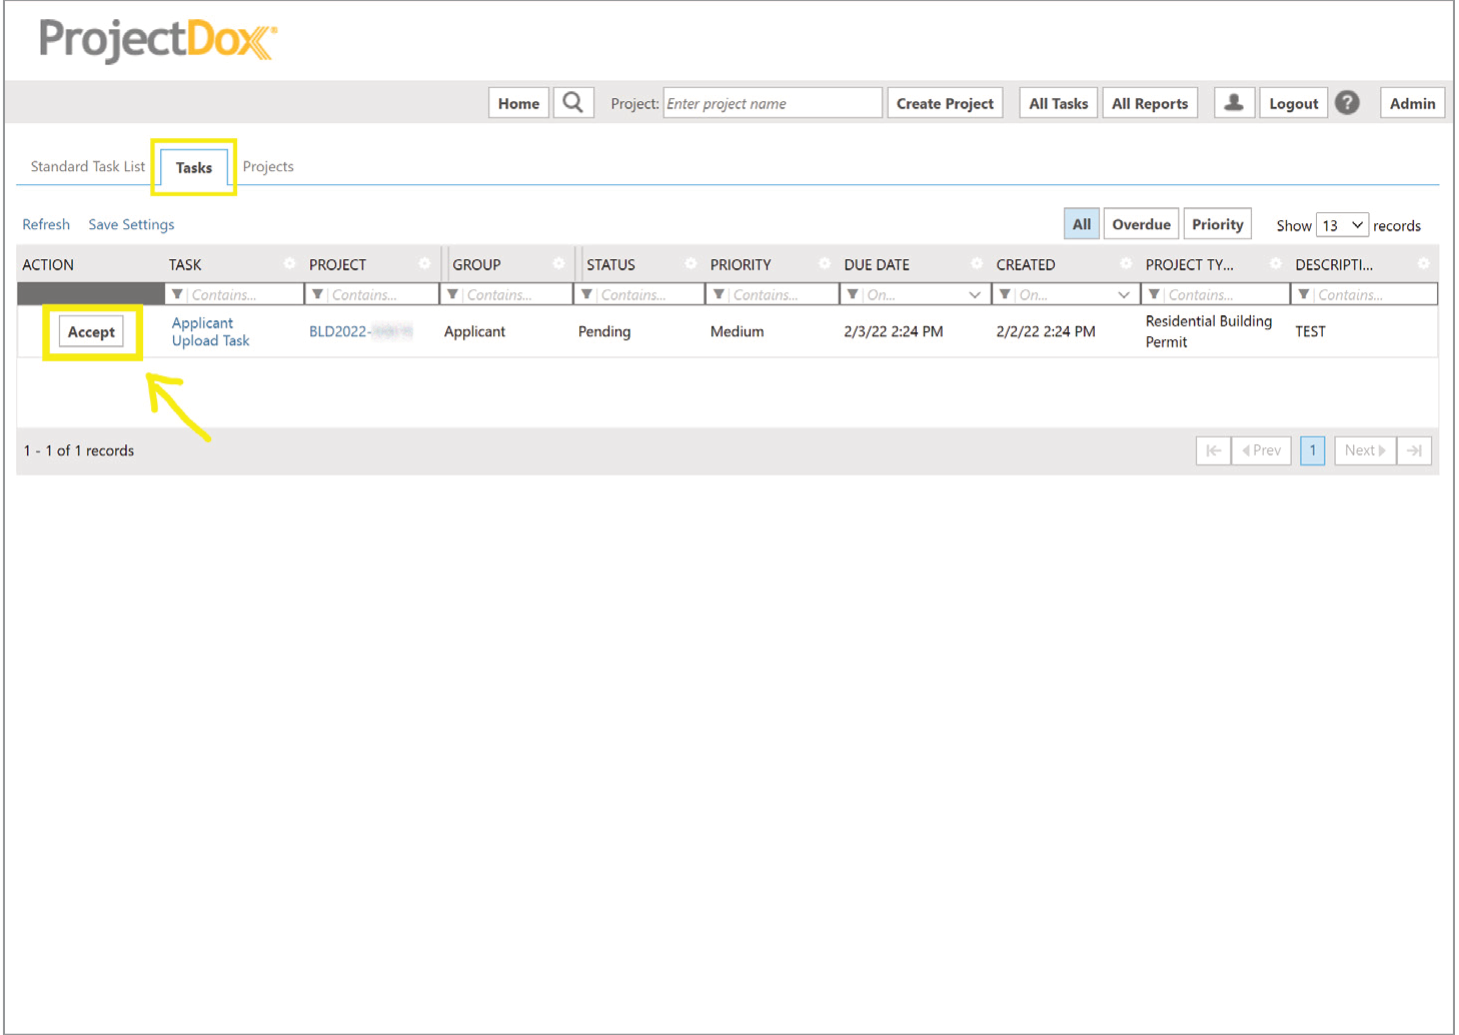
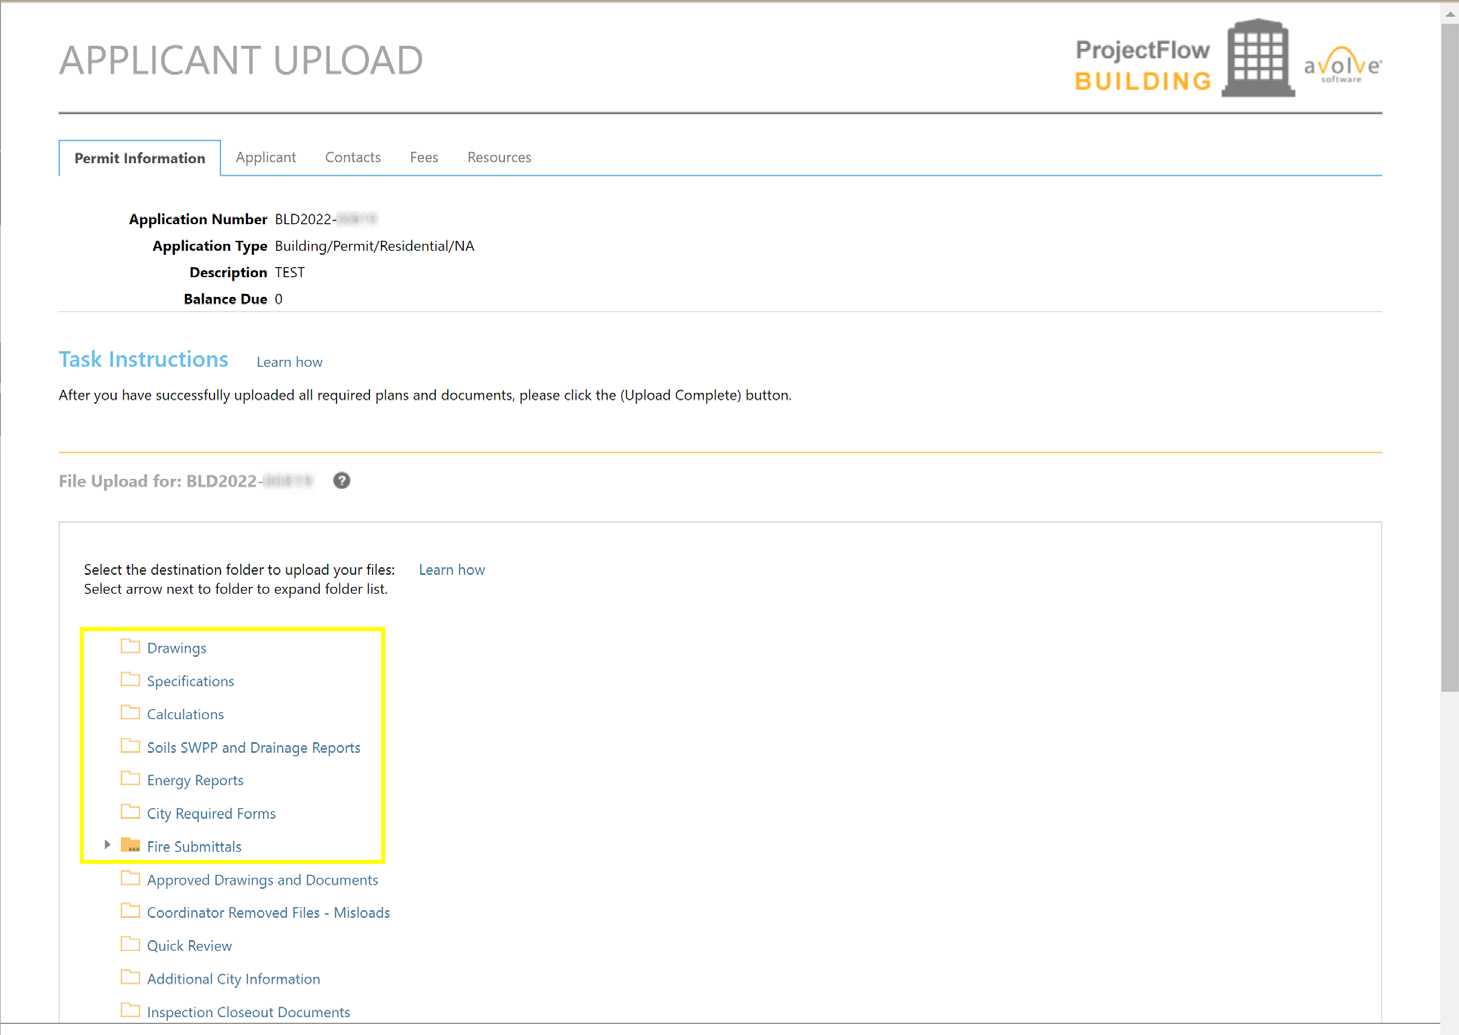
Select the appropriate folder for the plan files.
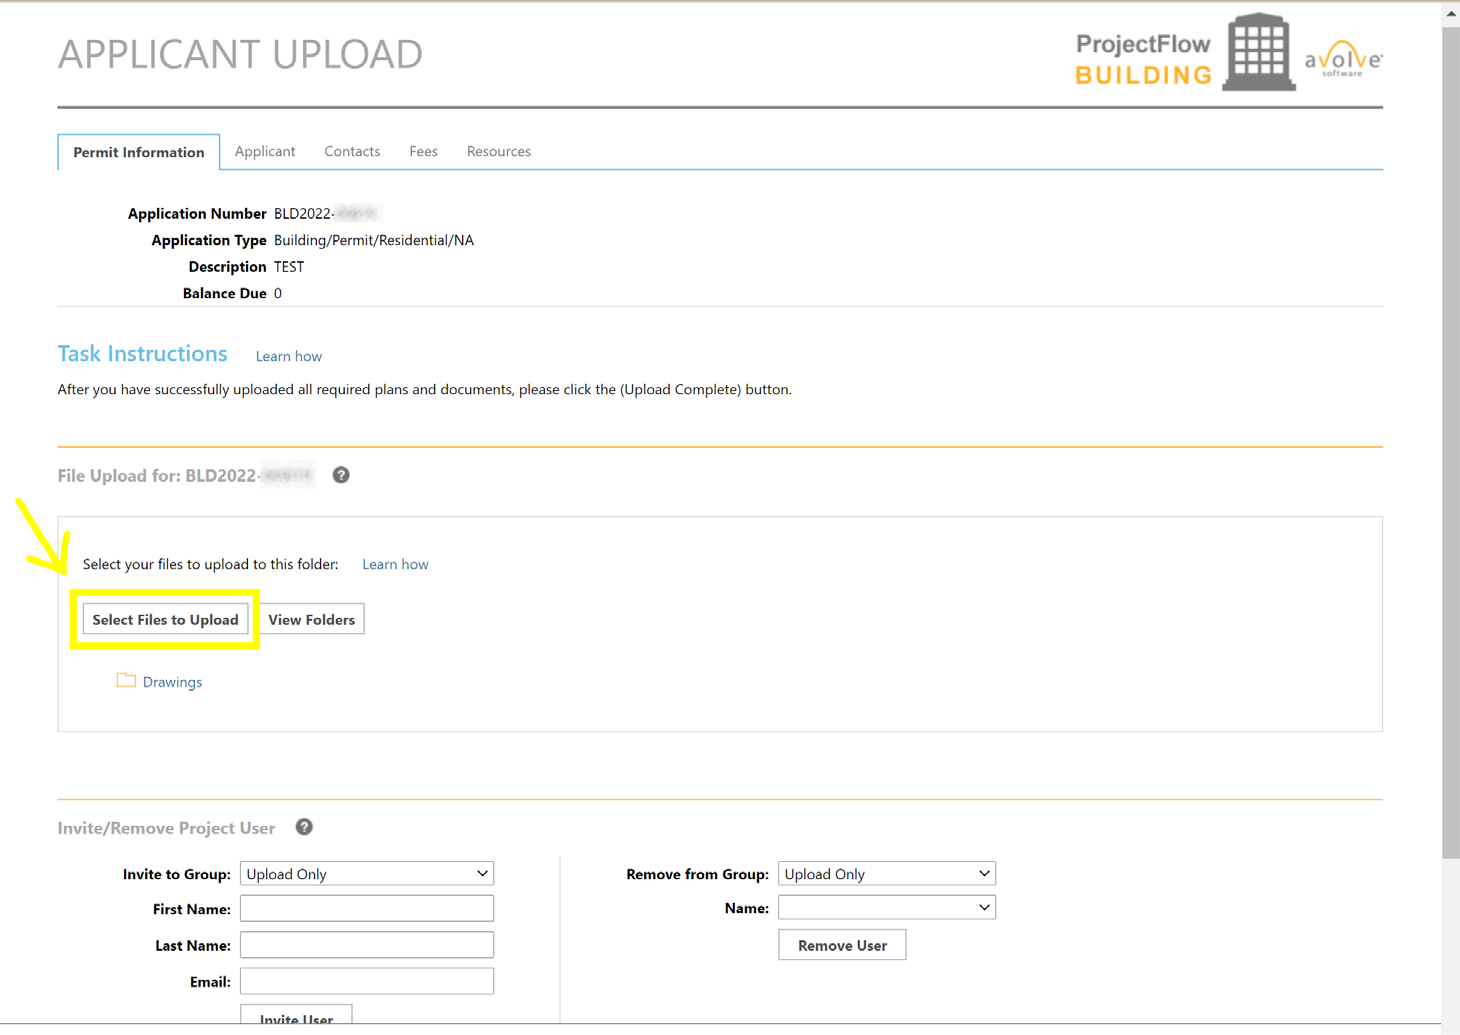
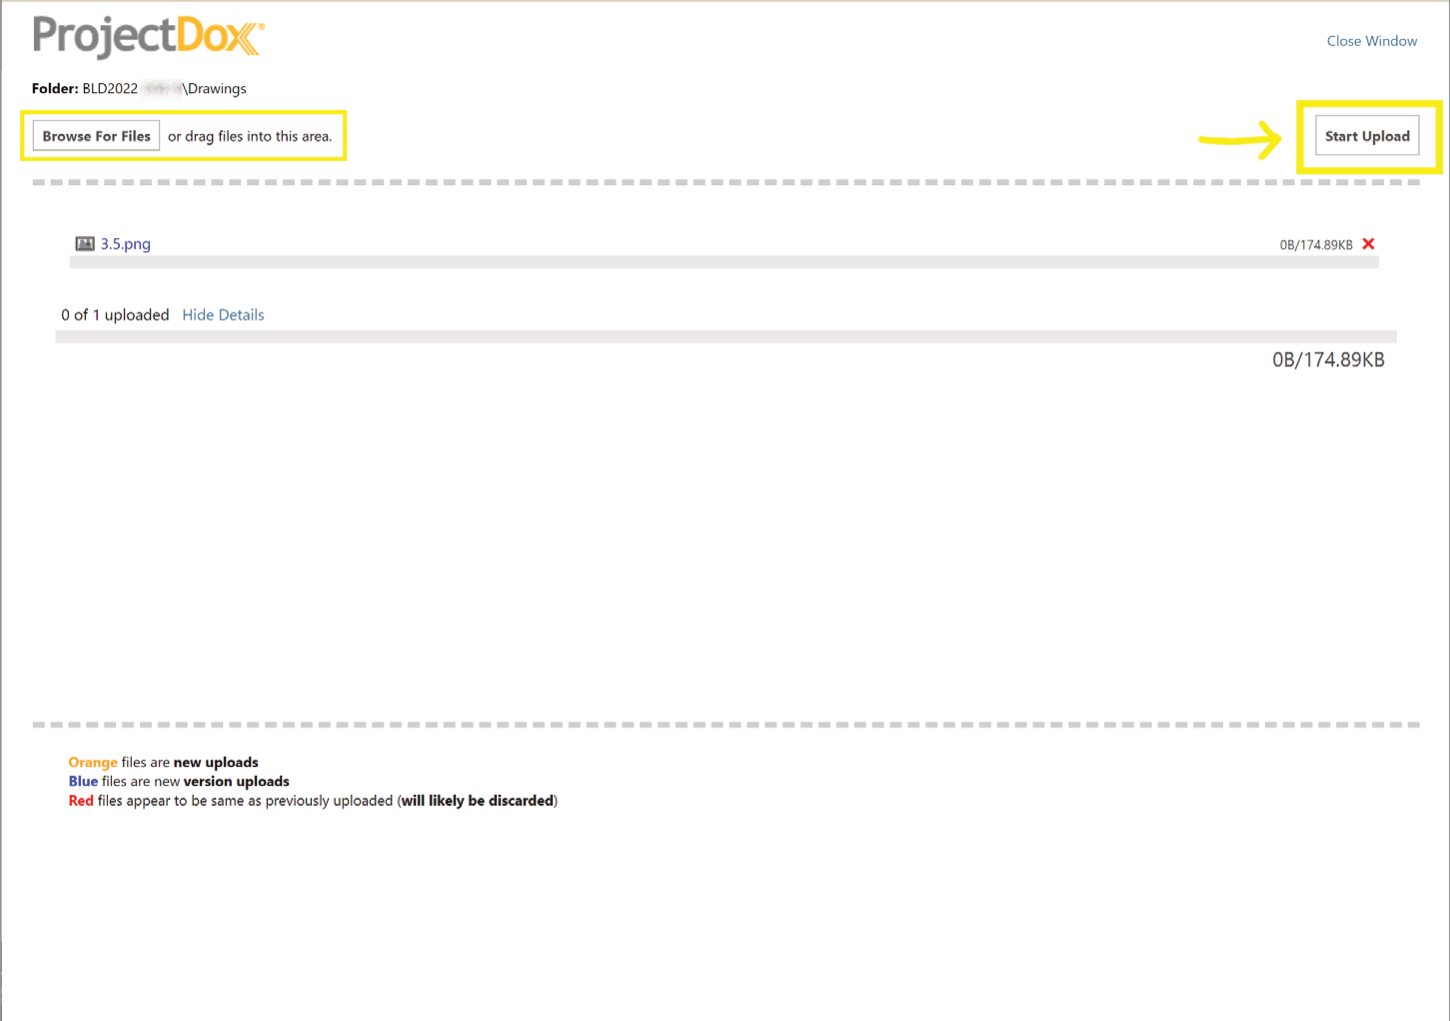
A new page opens. Browse for files or drag them into the marked area. After the files appear on the page, select “Start Upload.”
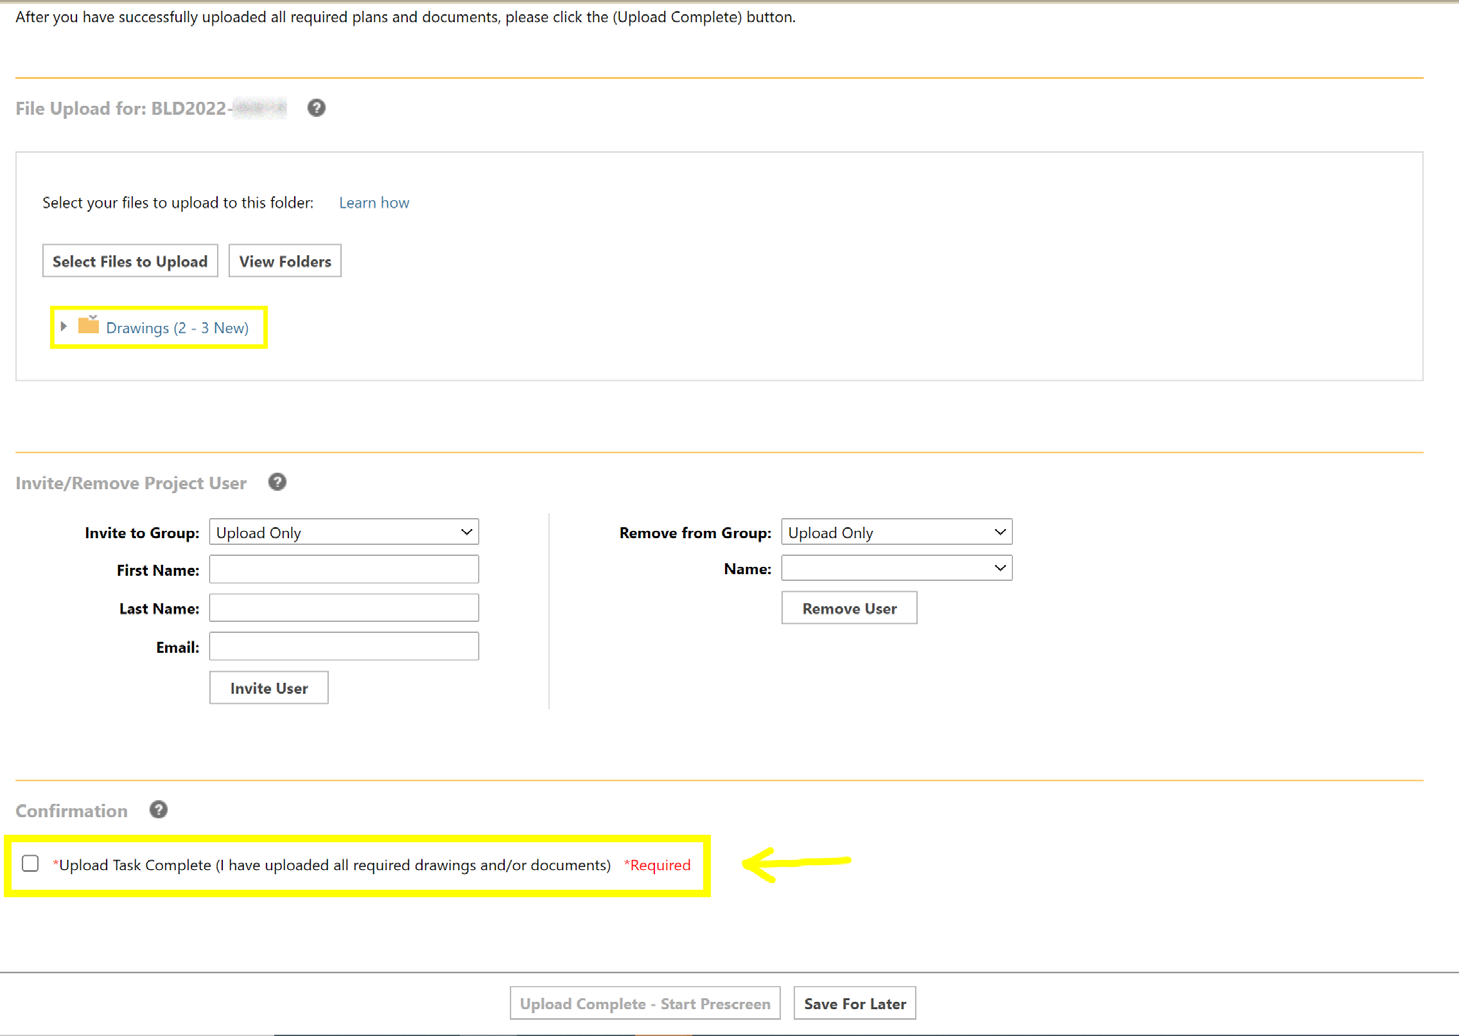
Uploaded files appear on the page. To upload to other folders, select “View Folders.” After uploading all files, check the box that confirms the upload task is complete.
Step 4
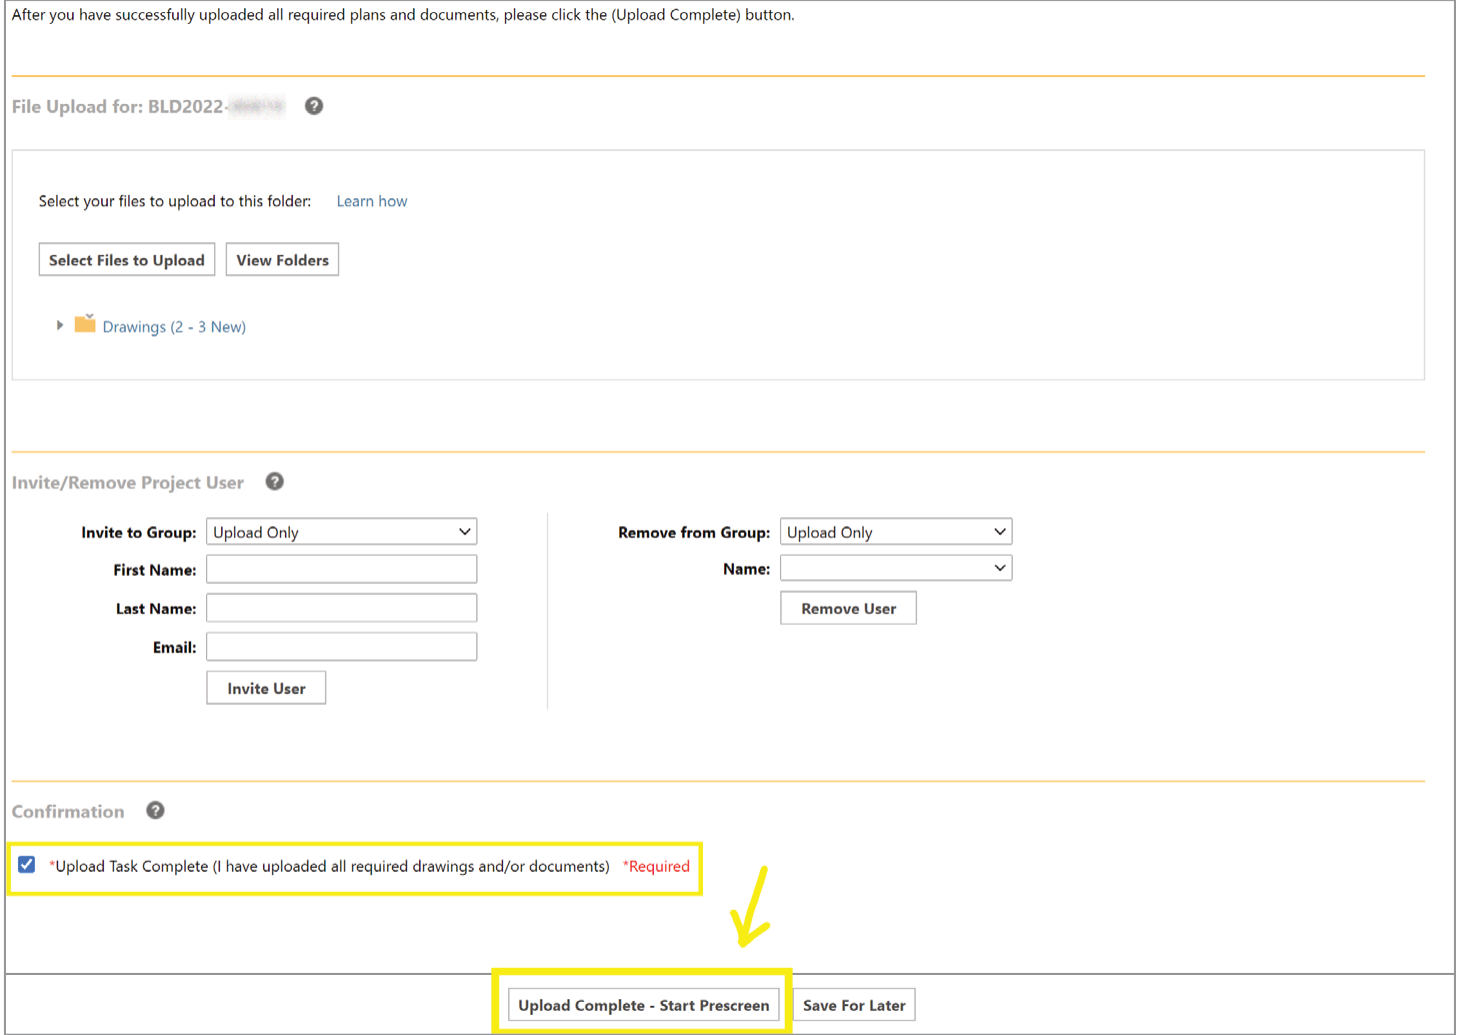
Confirm the upload checkbox is marked, then select “Upload Complete - Start Prescreen.”
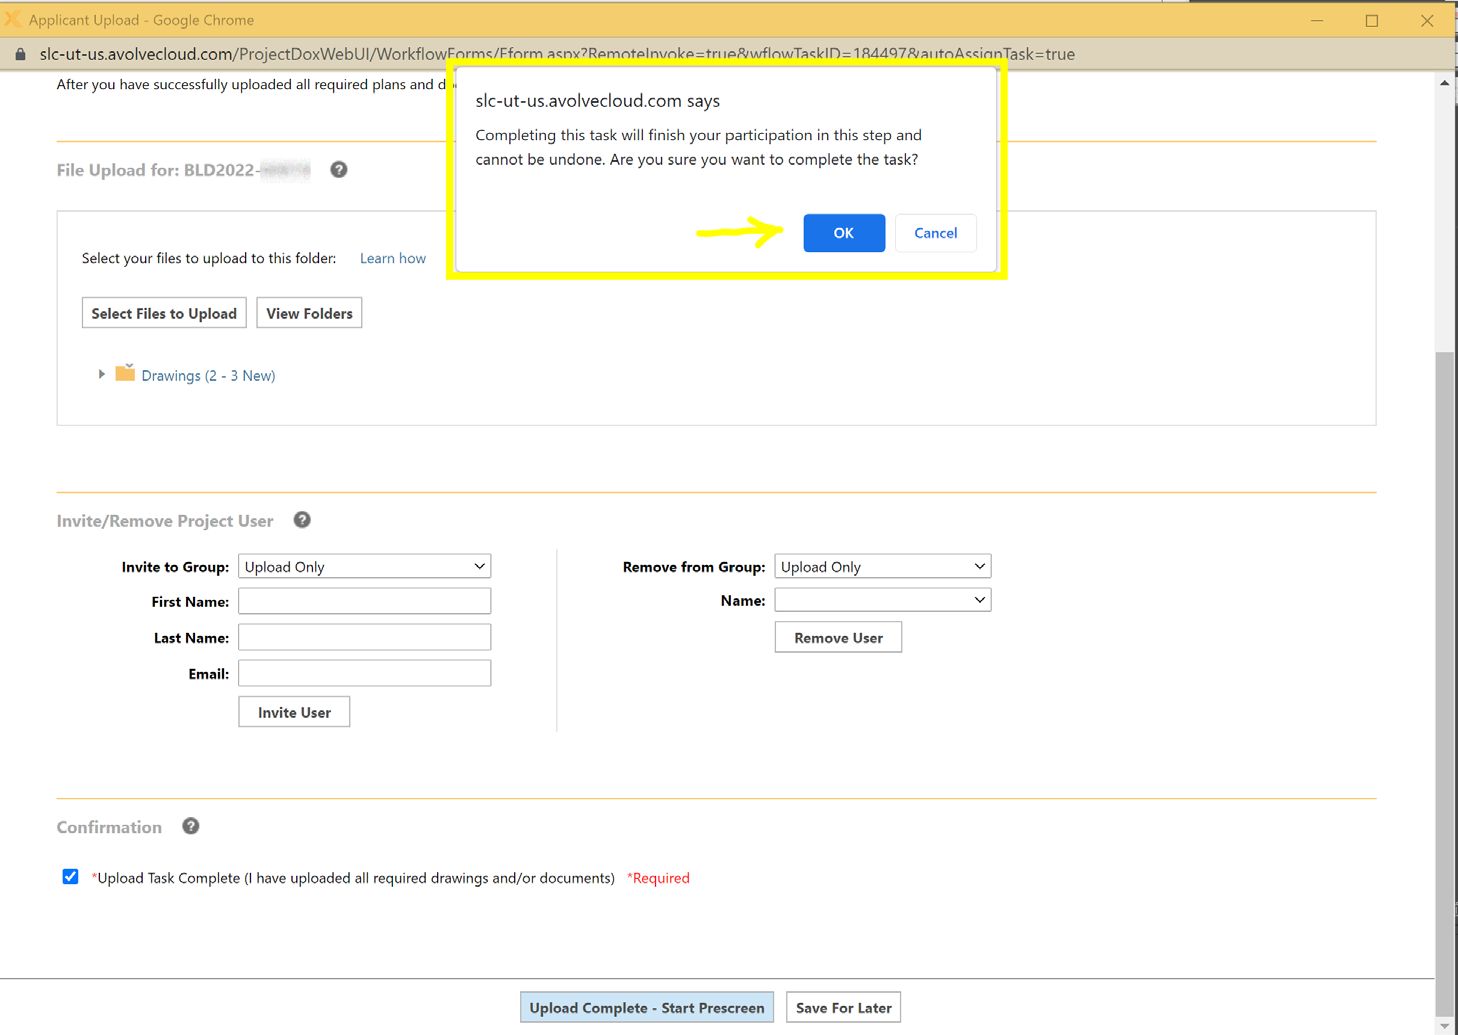
A confirmation message appears. Uploads will not be possible after selecting “OK” and until prescreen review is complete.
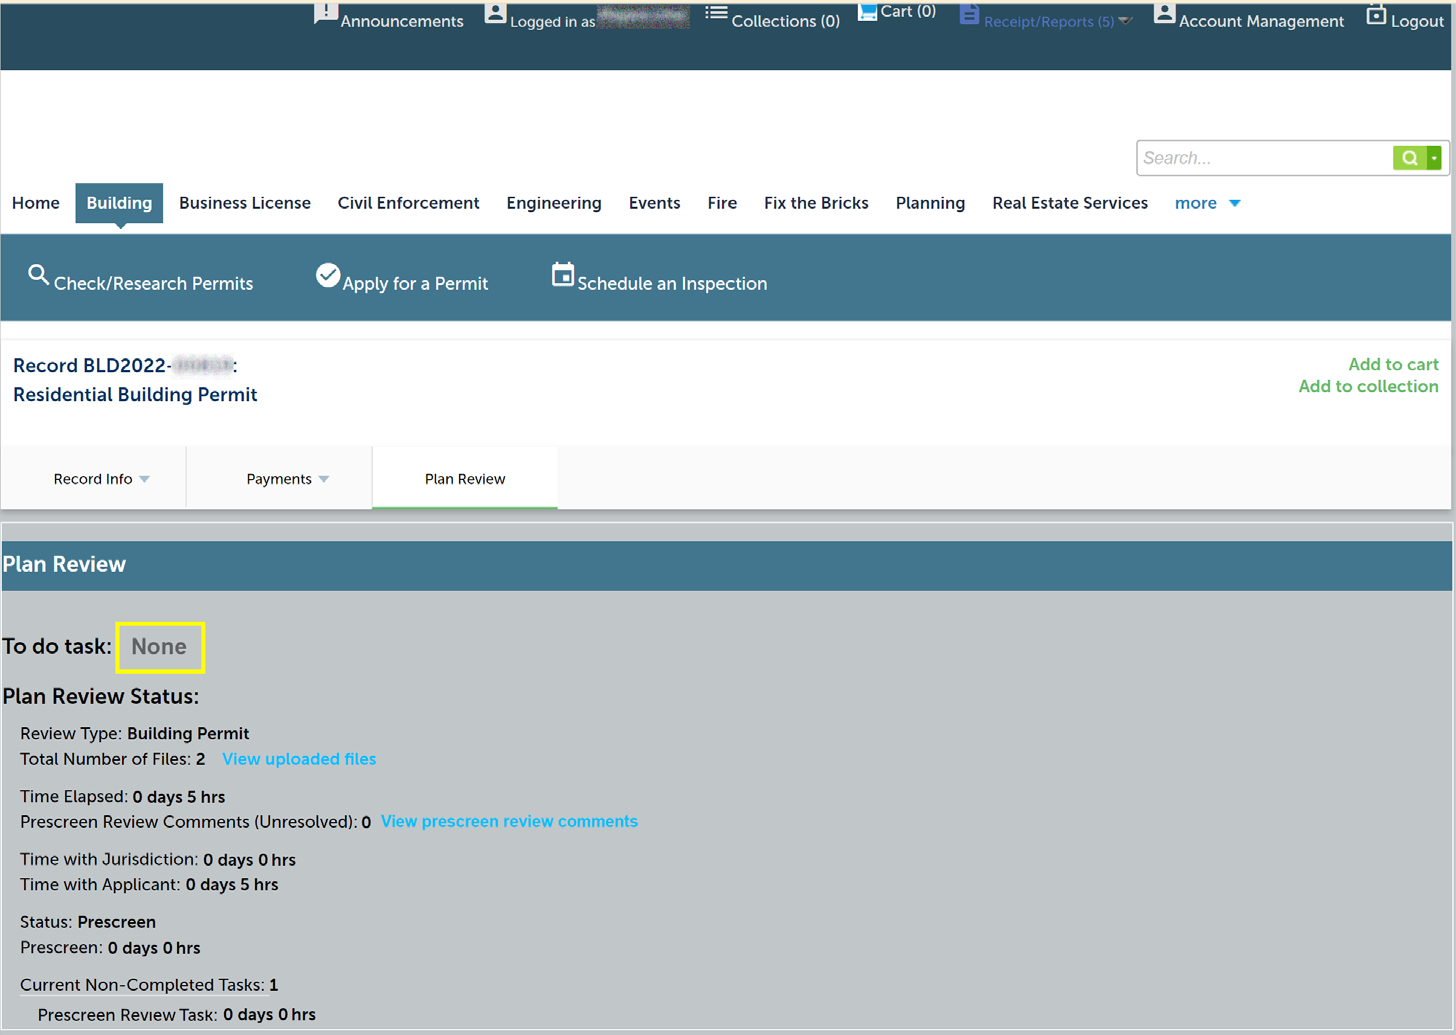
Refresh the Citizen Access Portal. “To do task” should show “None.” Plans are now routed to the city, and no further action is needed until prescreen review is complete.