
Setup and Connection
Install FileToWeb Integration, connect a workspace API key, and validate the WordPress configuration.
Use these steps for a new WordPress or ProudCity customer.
Before you begin
You need:
- A FileToWeb Team workspace for this WordPress site or customer
- A FileToWeb project or default folder for API conversions
- An active API entitlement and enough Credits for the PDFs you plan to process
- Permission to install plugins and manage FileToWeb settings in WordPress
For customer isolation, use a dedicated FileToWeb workspace and API key for each customer site. Credits, members, usage, and billing then remain scoped to that customer.
Install the plugin
- Install FileToWeb Integration in
wp-content/plugins/filetoweb-integration. - Open Plugins in WordPress.
- Activate FileToWeb Integration.
- Open Settings > FileToWeb.
Use an immutable release tag from the FileToWeb Integration repository in managed deployments.
Create an API key
- Sign in to FileToWeb.
- Open the customer's Team workspace.
- Open Settings > API keys.
- Create a project-scoped key for the WordPress integration.
- Copy the key when it is displayed. The full key is not shown again.
Treat the API key like a password. Do not send it in a support ticket, screenshot, issue comment, or public log.
Configure WordPress
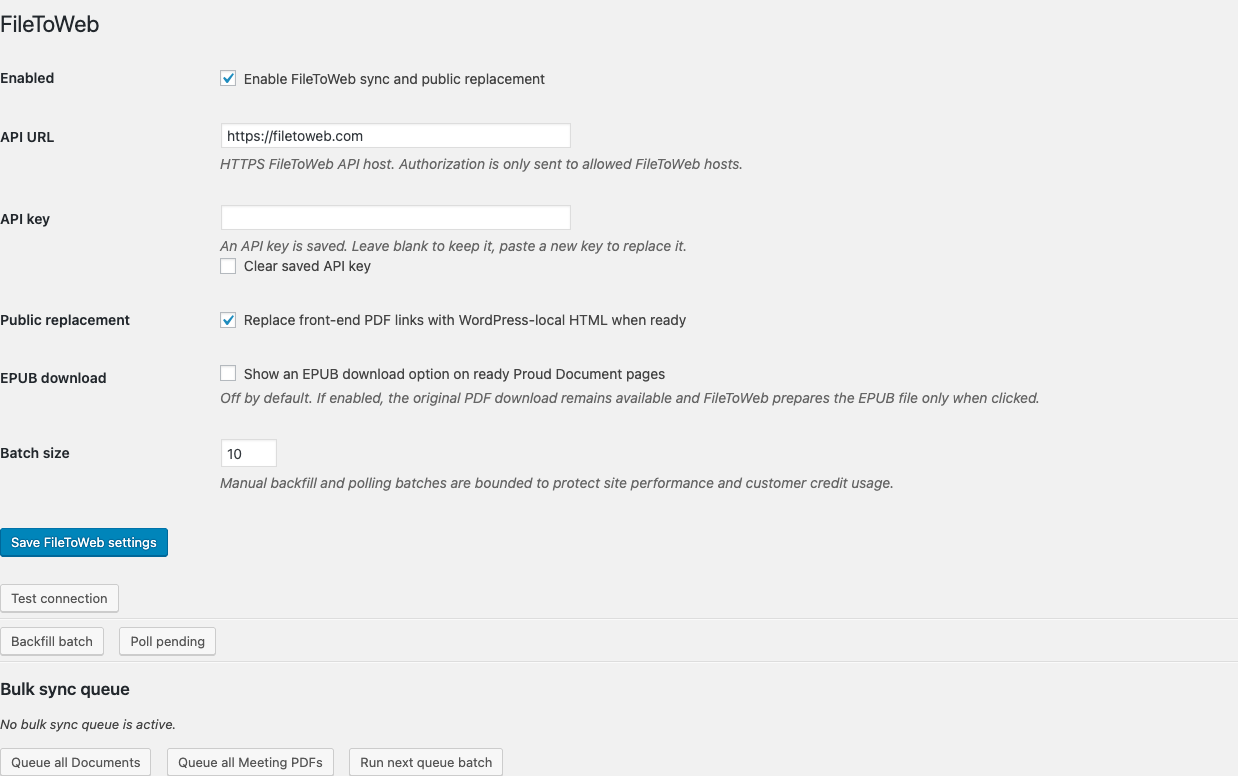
The saved API key is intentionally not visible. Leave the API key field blank when saving unrelated setting changes.
Set the fields as follows:
| Setting | Recommended value | What it controls |
|---|---|---|
| Enabled | On | Allows sync, polling, and active-plugin link replacement |
| API URL | https://filetoweb.com | FileToWeb API host |
| API key | Customer's scoped key | Authenticates this WordPress site to its FileToWeb workspace |
| Public replacement | On for normal operation | Uses ready WordPress-local HTML on the public site |
| EPUB download | Off unless requested | Adds an optional EPUB action while preserving the original PDF download |
| Batch size | Start with 5 or 10 | Limits each polling, backfill, or bulk-queue processing batch |
Click Save FileToWeb settings.
Test the connection
Click Test connection after saving the API key.
A successful test confirms:
- The API key is valid.
- The associated FileToWeb workspace and folder can be resolved.
- The key has the document read and write permissions required by the plugin.
The test never displays the stored API key.
If the test fails, do not begin a migration. Review Troubleshooting and support.
Validate with one PDF
Before using backfill or a bulk queue:
- Choose one small PDF attachment or Proud Document.
- Click Sync PDF now.
- Wait for the status to become Ready. Use Poll status if needed.
- Open View local HTML copy.
- Open the public page and confirm the expected preview or link.
- Confirm View original PDF still opens the source PDF.
Only begin a larger migration after this single-file validation succeeds.
API key maintenance
- Leave the API key field blank to keep the saved key.
- Paste a new key to replace the saved key.
- Select Clear saved API key to remove it from WordPress.
- Clearing the key stops future API operations after scheduled work is cleared, but it does not delete original PDFs or completed WordPress-local previews.
- Revoke a compromised key in FileToWeb, then replace it in WordPress.